How Long Do Bubble Gaskets Last? Lifespan Guide for Homeowners
How Long Do Bubble Gaskets Last? Lifespan Guide for Homeowners Bubble gasket performance is a common concern for homeowners and trade professionals working...
How Long Do Bubble Gaskets Last? Lifespan Guide for Homeowners
Bubble gasket performance is a common concern for homeowners and trade professionals working with windows and doors. These tubular seals provide draught-proofing, weather protection and sound reduction for PVC-U, aluminium and timber frames. Lifespan varies considerably by material, installation quality and environment; this post explains realistic expectations, signs of failure, maintenance tips and practical replacement guidance for both DIYers and tradespeople.
Typical lifespans by material
Bubble gaskets are manufactured from a few common elastomers; each has different properties that influence longevity. The ranges below are approximate and assume normal use and correct installation.
- EPDM (ethylene propylene diene monomer): 12 to 20 years. Excellent weather resistance, good UV and ozone tolerance; common on higher-quality windows.
- TPE (thermoplastic elastomer): 10 to 20 years. Good flexibility and recyclability; performance depends on grade and additives.
- Silicone: 20+ years. Outstanding temperature and UV resistance; used where longevity and resilience are required.
- PVC and soft-PVC profiles: 5 to 12 years. Economical but more prone to hardening, cracking and UV degradation; common in older or budget-fit systems.
- Co-extruded or specialised blends: variable. Manufacturers may add UV stabilisers and oils to extend life; check product data sheets.
Factors that shorten or extend service life
Predicting exact life for a bubble gasket requires considering site conditions, window usage and installation details:
- Exposure: coastal locations with salt spray, or roofs and conservatories that receive direct sunlight, accelerate degradation.
- Mechanical wear: frequently opened doors or windows, pets, and rubbing against hardware will reduce life; compression set can occur where the gasket is continuously crushed.
- Chemicals: cleaning agents and paint solvents can attack elastomers; avoid using petroleum-based products on seals.
- Installation: incorrect groove size, overstretching during fitting, or poor corner details cause early failure; tradespeople should follow manufacturer tolerances.
- Age: natural ageing, evidenced by loss of elasticity, hardening and cracking, is the most common reason for replacement.
Signs your bubble gasket needs replacing
Homeowners and installers should carry out simple checks once a year. Replace a bubble gasket if you notice any of the following:
- Visible cracks, splits or sections that have flattened and will not rebound.
- Draughts around the sash or door that were not present previously.
- Water ingress during heavy rain at joints or along the seal line.
- Increased condensation between glazing units or a drop in thermal performance.
- Difficulties closing or locking a window because the seal has become too thick or swollen.
DIY inspection and simple maintenance
Inspecting and maintaining bubble gaskets is straightforward and can delay replacement:
- Check the seal visually and by touch: run a finger along the gasket and feel for hard spots or stickiness.
- Clean with a soft cloth and warm soapy water; avoid solvents and strong detergents.
- Apply a silicone-based lubricant or specialist seal conditioner to restore flexibility; do not use petroleum-based oils.
- Check compression: when the window is closed the gasket should be compressed but still rebound; permanent flattening indicates failure.
Replacing a bubble gasket: practical DIY steps
Small repairs can be completed by competent DIYers. For full-frame replacement or where warranties apply, consider a professional fitter. Typical replacement steps:
- Tools and materials: replacement bubble gasket profile, sharp utility knife, flat screwdriver or glazing bead tool, isopropyl alcohol, soft cloth, silicone lubricant, adhesive if required and end caps if specified.
- Remove glazing bead or beadless stop carefully using a plastic wedge or glazing tool; support the glass to avoid stress.
- Pull out the old gasket: work along the run slowly to avoid damaging the groove. Cut away any stubborn sections with a knife.
- Clean the groove with cloth and isopropyl alcohol; remove old adhesive and debris so the new gasket seats correctly.
- Check the profile size and match the replacement bubble gasket to the groove; common nominal sizes include 5mm, 6mm and 8mm cores but confirm by measuring the channel width and depth.
- Fit the new gasket: start at one end, feed into the channel without over-stretching; use a soapy water solution to ease insertion if necessary. Work gradually and press fully into the groove with a flat tool.
- Trim ends squarely and, where appropriate, use a small dab of compatible adhesive at corners or joins; avoid excessive adhesive that can obstruct compression.
- Refit glazing bead or stop, re-seat the glass and check operation and compression; test for draughts and water ingress after installation.
Trade tips for professionals
Tradespeople can save time and reduce callbacks by following a few best practices:
- Stock common gasket sections and lengths; keep manufacturer samples for on-site comparison.
- Use glazing bead removal tools to reduce damage; carry profile gauges to measure channels quickly.
- Pre-cut lengths to reduce stretch on-site; allow a small contraction allowance rather than forcing a longer piece in.
- Record the profile code and material on job sheets; customers appreciate a like-for-like replacement for warranty reasons.
- For heritage or unusual sashes, consider ordering a replica profile from a specialist extruder; off-the-shelf profiles can look and perform poorly if they do not match.
When to call a professional
Replace the gasket professionally in these scenarios: large areas of failing seal, glazed units moved or stressed, windows under guarantee, timber frames where removal risks damage and where mastic, adhesives or structural seals are involved. Professionals can also pressure-test and ensure compliance with weathering standards.
Recommended Products
Based on this article, you may find these products helpful:
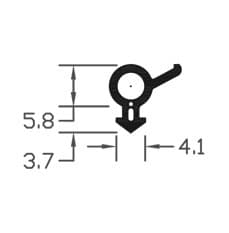
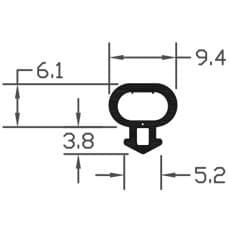
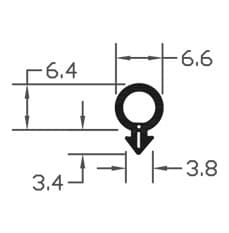
- B003 Bubble Gasket
- B004 Bubble Gasket
- B007 Bubble Gasket
- E-Type Gasket - Black 5m Roll
- E-Type Gasket - Black (Per Metre)
Conclusion and next steps
Bubble gaskets can last from under a decade to more than 20 years depending on material, exposure and installation quality. Regular inspection, correct cleaning and timely replacement of worn sections will keep windows and doors watertight and thermally efficient. For a closer look at different gasket and seal types consult our pillar page: /guides/gaskets-seals.
Next steps: inspect your seals, note the material and profile, and decide if the job is suitable for DIY or requires a trade fitter. If you need parts or advice, contact Window Hardware Store with the profile measurements or photos and our team will recommend a suitable bubble gasket and fitting kit.