How to Fit a Bubble Gasket on Double Glazed Windows: Step-by-Step Guide
How to Fit a Bubble Gasket on Double Glazed Windows: Step-by-Step Guide Replacing or fitting a bubble gasket is a straightforward way to improve draught-pr...
How to Fit a Bubble Gasket on Double Glazed Windows: Step-by-Step Guide
Replacing or fitting a bubble gasket is a straightforward way to improve draught-proofing, reduce noise and prolong the life of double glazed windows. This post covers the materials, preparation, practical fitting steps and common trade tips for both DIYers and professional installers. If you need other seal types or background theory, see our pillar page: /guides/gaskets-seals.
What is a bubble gasket and where it is used
A bubble gasket is a rounded, bulb-shaped seal typically manufactured from EPDM rubber or thermoplastic elastomer. It is used as a perimeter sash seal, edge seal against glazing beads, or as a weatherstrip around casements and sliding windows. The profile compresses to form a seal when the sash closes, preventing wind and water ingress while allowing smooth operation of the window.
Tools and materials you will need
- Correct bubble gasket profile and material for your window (check width and bulb diameter)
- Measuring tape
- Sharp utility knife or gasket scissors
- Gasket roller or rubber beading tool
- Small flat screwdriver or seal removal tool
- Isopropyl alcohol or mild detergent and clean cloths
- Soapy water or proprietary gasket lubricant (not petroleum-based)
- Adhesive if using self-adhesive type or for butt-joints (recommended by manufacturer)
- Heat gun for tight curves (trade use only; use low heat)
- Safety gloves and eye protection
Choosing the right bubble gasket
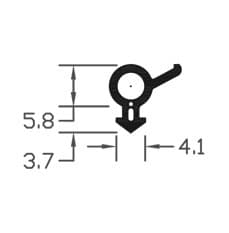
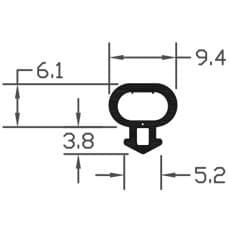
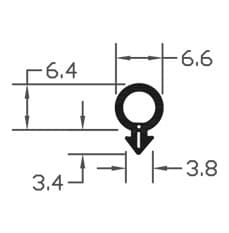
Measure the existing seal or the slot where the gasket will sit: the two important dimensions are the base width and the bulb diameter. Choose a gasket profile that fits snugly into the groove without excessive compression when the window closes. For uPVC frames EPDM is common; for timber or aluminium confirm chemical compatibility with any finishes or adhesives. Trade installers should carry a small range of nose and bulb sizes to match on-site variations.
Preparation: remove old seal and clean the channel
- Open the sash and examine how the existing bubble gasket sits. If replacing, use a flat screwdriver or seal removal tool to prise out the old gasket carefully. Take care not to damage glazing beads or paint.
- Remove adhesive residue with isopropyl alcohol; avoid harsh solvents that can swell EPDM.
- Clean the channel with a soft brush and dry thoroughly.
- Check the groove for any damage or paint buildup; repair or scrape back to the original profile if necessary.
Measuring and cutting the bubble gasket
Measure the perimeter of the sash or frame and add 5 to 10 percent for waste. For a neat finish choose one of two corner methods:
- Butt joint: cut the gasket to exact lengths and butt the ends at each corner. This method avoids overstretching and is often preferred on PVC where movement is possible.
- Mitred corners: cut the gasket at 45 degree angles to form a neat mitre. This gives a cleaner look for visible seals; use a small amount of adhesive in the joint for durability.
The butt joint is generally more forgiving and recommended for most double glazed sash seals; however, where appearance matters, mitred corners fitted by an experienced installer give the best finish.
Fitting the bubble gasket
- Apply a light coat of soapy water or gasket lubricant into the groove; this eases installation without degrading the material.
- Start at the bottom centre of the sash and push the bubble gasket into the channel. For push-in profiles feed the base into the groove and then roll the bulb into place with a gasket roller or beading tool.
- Work towards the corners, using short, firm pushes. Keep the gasket flat and avoid twisting the profile.
- At corners use the chosen method: butt ends together and compress slightly; for mitres, trim accurately and join at the corner with a touch of adhesive if specified by the manufacturer.
- For tight radii warm the gasket gently with a heat gun on low setting; soften it just enough to bend without stretching. Do not overheat; excessive heat will deform the seal permanently.
- When the gasket is in place, use the roller to seat the seal firmly into the groove and remove any lubricant with a clean cloth.
Checking operation and final adjustments
Close the window and check the sash operation: it should close smoothly without catching. Inspect the compression of the bubble gasket around the perimeter; you want firm contact but not excessive pinch that stresses hardware. If adjustments are needed:
- Move the gasket slightly in the groove to relieve tight spots.
- If the gasket is too thick and prevents closure, replace with a slimmer profile.
- For minor leaks, apply compatible silicone sealant on the exterior only after confirming the gasket fit and movement.
Trade tips and common pitfalls
- Always carry spare sections of common profiles; on-site replacements are frequent.
- Do not use petroleum-based sprays for lubrication; they will degrade EPDM and some TPEs.
- Avoid stretching the gasket excessively during fitting; compressed joints will relax over time and cause gaps.
- Record the profile code or take a close-up photo before removing an old seal; it speeds ordering replacements.
- When using adhesive, follow the manufacturer’s curing time before testing window operation.
Aftercare and maintenance
Once fitted, clean the gasket periodically with mild detergent and check for wear. Replace any sections showing cracks, permanent deformation or loss of elasticity. Well-maintained bubble gaskets typically last several years depending on exposure to UV and pollutants.
Recommended Products
Based on this article, you may find these products helpful:
- B003 Bubble Gasket
- B004 Bubble Gasket
- B007 Bubble Gasket
- E-Type Gasket - Black 5m Roll
- E-Type Gasket - Black (Per Metre)
Conclusion and next steps
Fitting a bubble gasket is an effective maintenance task that can be completed by a competent DIYer or a trade professional in under an hour for a standard sash. Start by identifying the correct profile, prepare the channel carefully and follow either butt or mitred corner techniques for a lasting result. If you are unsure about profile selection or require a replacement for aluminium or heritage windows, contact a specialist or visit our guides at /guides/gaskets-seals. For orders, sample requests or trade pricing, get in touch with Window Hardware Store for expert assistance.