How to Measure Your Window Frame for Replacement Bubble Gaskets
How to Measure Your Window Frame for Replacement Bubble Gaskets Bubble gasket replacements are a common maintenance task for both homeowners and window ins...
How to Measure Your Window Frame for Replacement Bubble Gaskets
Bubble gasket replacements are a common maintenance task for both homeowners and window installers. Getting the measurements right is essential to ensure an airtight, weatherproof seal and to avoid wasted material or refitting time. This post explains how to identify the correct bubble gasket profile, take accurate measurements and prepare for a clean installation.
What is a bubble gasket and where it is used
A bubble gasket is a hollow, round or oval rubber seal with a flat base or tail that fits into a groove, channel or onto a face. Most are made from EPDM or TPE and are used around the perimeter of sash and casement windows to provide a compression seal between moving and fixed parts. They can also be used on entrance doors and some conservatory frames. Bubble gaskets compress to fill irregularities while maintaining good thermal and acoustic performance.
Identify the profile before you measure
Before taking measurements, identify how the gasket is held: is it push-in to a groove, face-fixed with a flange, or adhesive-backed? Look for the following clues:
- Visible base or tail sitting in a slot: groove-mounted profile.
- Flat flange stuck to a flat face: adhesive or screw-fixed profile.
- Old gasket still present: remove a short section and note the bulb diameter and base width.
- Manufacturer marks on the profile; photograph any stamp and the frame for supplier checks.
Tools you will need
- Tape measure and a marker.
- Vernier calipers or digital callipers for accurate cross-section measurements.
- Feeler gauges for tight gaps.
- Flat screwdriver or gasket removal tool to prise out old seals.
- Heat gun to soften stiff rubber if required; avoid open flame.
- Cleaning cloth, isopropyl alcohol or methylated spirits for preparation.
Step-by-step measurement process
Follow these steps to capture the measurements you will need when ordering replacement bubble gaskets:
- Measure the frame perimeter: measure the total length of each side of the area where the gasket will sit. For sash windows measure the sash perimeter; for casements measure the fixed frame or sash as appropriate. Record each length in millimetres and add together for total run length.
- Allow waste: add an overage of 5 to 10 percent to the total length to allow for mistakes and cutting losses; trade installers often order an extra metre per run if long lengths are required.
- Measure the groove or slot: use calipers to record the width and depth of the groove that the gasket base inserts into. Measure across the slot opening and its internal cavity depth; these two dimensions determine which tail or base profile will fit.
- Measure the bulb diameter: if the old gasket is present, measure the bulb at its widest point when at rest. If removed, measure the seating face of the opposing frame to understand how much compression is required.
- Measure flange width and thickness: if the gasket has a flange that sits on a face, measure its width and thickness to ensure the replacement’s flange will sit flush without interfering with hardware.
- Check compression requirement: measure the gap between the fixed and moving parts when closed. Typical bubble gasket compression is 10 to 30 percent of bulb diameter; ensure replacement will compress sufficiently to seal but not prevent movement.
- Note corner and joint type: determine whether mitred corners are used or if profiles are butted and spliced. This will affect how much extra length you need and whether corner keys are required.
Practical trade tips
- If you cannot remove the old gasket, take clear close-up photos of the profile and a photo of the whole frame. Suppliers can often identify profiles from images.
- When measuring narrow grooves, use calipers rather than a tape measure for precision; a few tenths of a millimetre can determine fit.
- Warm rubber briefly with a heat gun to give a snug fit when inserting into tight grooves; do not overheat as this can damage the material or the frame finish.
- Use soapy water or a specialist rubber lubricant to ease the gasket into position; avoid petroleum-based lubricants which can degrade EPDM.
- For long runs, store gaskets coiled for as short a time as possible to prevent set; allow them to relax at room temperature before fitting.
- For trade replacements, order sample lengths of likely profiles to trial-fit on site before committing to large quantities.
DIY removal and preparation
Remove the old gasket carefully with a gasket removal tool or flat screwdriver. Clean the channel thoroughly with isopropyl alcohol to remove old adhesive, dirt and paint. For adhesive-backed profiles, ensure the surface is dry, dust-free and degreased. For groove-fitted profiles, check for paint build-up which can reduce slot width; remove paint with a scraper if needed.
Ordering and material choices
Common bubble gasket materials are EPDM and TPE; EPDM has excellent weather and UV resistance and is the standard for exterior seals. Choose black as standard; white or grey may be available for specific frames. When ordering, provide:
- Profile photo or sketch;
- Bulb diameter and base dimensions in millimetres;
- Total ordered length plus specified overage;
- Material and colour;
- Any corner keys or splice adhesive required.
Troubleshooting common issues
If the replacement gasket squashes excessively, the bulb diameter may be too large for the application or the frame faces may be misaligned; choose a slightly smaller bulb or check frame alignment. If the gasket does not compress enough and leaks persist, try a larger bulb profile. If the tail will not fit into the groove, check for paint or debris and confirm the groove dimensions.
Recommended Products
Based on this article, you may find these products helpful:
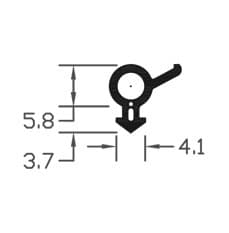
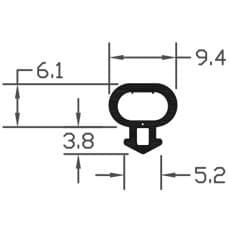
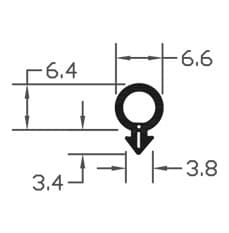
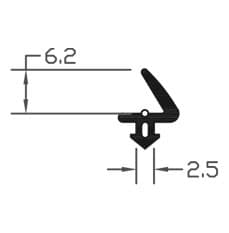
- B003 Bubble Gasket
- B004 Bubble Gasket
- B007 Bubble Gasket
- E-Type Gasket - Black 5m Roll
- F006 Flipper Gasket
Conclusion and next steps
Accurate measurement of the groove, bulb and overall run length is the key to a successful bubble gasket replacement. Use calipers for cross-section dimensions, photograph unknown profiles and allow extra length for joints and errors. If you need further assistance, visit our pillar page for gaskets and seals at /guides/gaskets-seals for detailed profiles and product options, or contact a trade adviser with photos and your measurements for a quick identification and quote.