How to Stop Draughts with the Correct Bubble Gasket Installation
How to Stop Draughts with the Correct Bubble Gasket Installation: a well fitted bubble gasket is one of the simplest and most effective ways to eliminate d...
How to Stop Draughts with the Correct Bubble Gasket Installation: a well fitted bubble gasket is one of the simplest and most effective ways to eliminate draughts around windows and doors. Whether you are a UK homeowner carrying out a DIY draught-proofing job or a trade professional fitting to plan, the right profile, material and installation method will make the difference between a temporary improvement and a long-lasting seal.
What a bubble gasket is and where to use it
A bubble gasket is a hollow, compressible tubular seal with a flat base or carrier designed to seal the gap between a sash and a frame or between a door and its stop. Common in uPVC, aluminium and timber joinery, bubble gaskets are used on casement windows, outward opening doors, garage doors and some patio or French door applications. They are most useful where a compressible volume is needed to accommodate irregular contact and to maintain a consistent seal under repeated movement.
Choosing the right bubble gasket: material and size
Selecting the correct bubble gasket is critical. Consider three attributes: material, bulb diameter and base/profile.
- Material: EPDM and silicone are the most durable and weather resistant for external applications. PVC is cheaper and easier to extrude; use only where UV exposure is limited. For exposed coastal sites choose EPDM or silicone for salt resistance.
- Bulb diameter: Common bulbs range from around 6mm to 15mm. Measure the gap you need to compress. Aim for 30 to 50 percent compression when the window or door is closed. Too little compression allows draughts; too much prevents correct operation.
- Base width and fixing type: Profiles are available as push-in, clip-on or self-adhesive. Use a push-in profile for factory grooves; choose adhesive-backed for retrofit where no channel exists. For timber doors a surface-mounted tubular gasket with a glazing-type carrier may be preferable.
Tools and preparation
Good preparation prevents problems during installation. Gather the right tools and make sure the frame is sound and clean.
- Tools: tape measure, marker, utility knife or sharp scissors, mitre block, pliers, gasket insertion tool or hard plastic spatula, heat gun or hair dryer (low setting), cleaning solvent (isopropyl alcohol), neutral cure silicone for end seals, and protective gloves.
- Preparation: remove old seal if present; clean the rebate and channel; check that moving parts run freely; inspect keeps and locks for alignment. If the existing frame has rotted or warped areas resolve this before fitting a new gasket.
Step-by-step: installing a bubble gasket
Follow these steps for a reliable installation. Tradespeople can adapt details for specialised profiles or factory-fixed channels.
- Measure and order: measure each length of the frame, allowing a little extra for trimming. Order the correct material and profile; for longer runs choose a single continuous length where possible to avoid joins.
- Cut to length: cut the gasket square for butt joints at corners, or mitre where the profile demands. Use a sharp blade and straight edge for a clean cut.
- Conditioning: warm PVC or rubber gaskets with a heat gun on low to make them more flexible; do not overheat as this will deform the profile. EPDM and silicone often need less warming.
- Insert or stick: for push-in profiles start at the top and press the base into the groove using a gasket insertion tool. For adhesive-backed seals remove the carrier strip and press firmly into position, working along the length to avoid trapped air.
- Trim and finish: trim excess at corners and apply a small bead of neutral cure silicone to any exposed ends to prevent water ingress. For butt joints press faces together and ensure compression match across the corner.
- Adjust hardware: operate the window or door to check action. If the seal prevents locking adjust keeps/striker plates or reduce bulb size; if the window binds, reposition or slightly reduce compression.
Practical trade advice and common pitfalls
Professional installers will recognise a few common issues that homeowners may miss:
- Wrong profile: buying a gasket with a base that is too narrow will pull out in use. Match the base width to the groove or choose a surface-mounted carrier.
- Over-compression: fitting an oversized bulb will distort hardware and can wear out locks. Measure gaps accurately and select a profile that compresses into the design range of the window or door.
- Adhesive failure: on older paint or limewashed surfaces adhesive may fail. Clean to bare substrate and use an appropriate primer or mechanical fixing if required.
- Warranty considerations: replacing factory-fitted gaskets on new uPVC windows can affect manufacturer warranties in some cases. Check with the manufacturer before replacing original seals.
- Thermal bridging and ventilation: sealing draughts is valuable for comfort and energy saving; however, maintain adequate background ventilation to control condensation and indoor air quality.
Testing and finishing touches
After installation perform a simple draught test: on a windy day pass a candle or incense stick along the seal with the window or door closed; observable movement indicates leakage. Also check operation through full range and verify multi-point locks engage without strain. For exposed external joints apply a small fillet of neutral cure silicone to waterproof corners; use matching colour where appearance matters.
Recommended Products
Based on this article, you may find these products helpful:
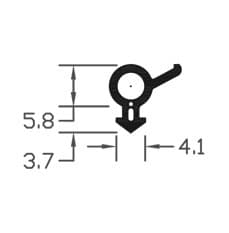
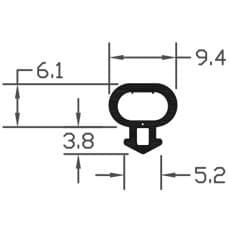
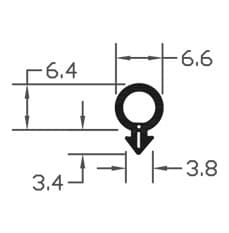
- B003 Bubble Gasket
- B004 Bubble Gasket
- B007 Bubble Gasket
- E-Type Gasket - Black 5m Roll
- E-Type Gasket - Black (Per Metre)
Conclusion and next steps
Correct selection and installation of a bubble gasket will substantially reduce draughts and improve thermal comfort for both homes and commercial properties. For a straightforward DIY job choose an adhesive-backed or surface-mounted bubble gasket and follow the steps above; for recessed channel seals or complex multi-point locking systems consider engaging a tradesperson to protect warranties and ensure correct adjustment. For more on materials, profiles and sealing systems visit our pillar on gaskets and seals and consult product datasheets for compression values and temperature limits. If you would like professional help, contact a local joiner or a Window Hardware Store technical advisor for profile recommendations and trade packs.