The Complete Guide to Bubble Gasket Profiles for Window Fitters
The Complete Guide to Bubble Gasket Profiles for Window Fitters What a bubble gasket is and where it is used A bubble gasket is a compressible seal with a ...
The Complete Guide to Bubble Gasket Profiles for Window Fitters
What a bubble gasket is and where it is used
A bubble gasket is a compressible seal with a round or oval hollow bulb and a base or fin that fits into a groove or adheres to a frame. Commonly made from EPDM, TPE, silicone or PVC, these profiles are used around casement windows, patio doors, rooflights and some sliding systems to stop draughts, water ingress and reduce noise. They are favoured where a soft, resilient contact is needed between sash and frame because the bulb compresses to form a consistent seal without excessive friction.
Common bubble gasket profiles and materials
- Bulb with snap-in leg: compressible bulb with a rigid base designed to clip into a closed channel; popular for uPVC and aluminium frames.
- Bulb with adhesive fin: offers a quick retrofit option for timber and older frames; supplied with foam or pressure-sensitive adhesive backing.
- Double bulb profiles: used where two sealing surfaces are needed, for example on French doors or meeting rails.
- Low-friction bubble: made from specialised thermoplastic elastomer; suited to sliding sashes to reduce wear.
Material choice matters: EPDM has excellent weathering, ozone and UV resistance; silicone performs better at high temperatures and remains flexible in cold climates; PVC and TPE are cost-effective for internal or less exposed applications.
How to choose the right bubble gasket: practical measurements
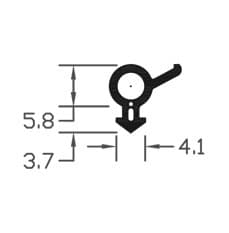
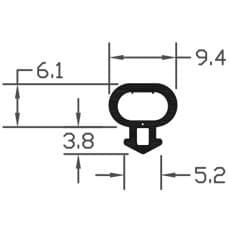
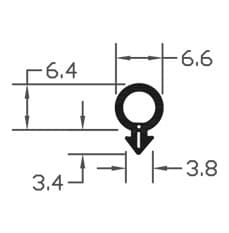
Measure three key dimensions before ordering: channel width or groove size; bulb diameter when uncompressed; and the depth of the channel so the base or leg can seat fully. For retrofit jobs with an adhesive fin, measure the contact face where the fin will stick to ensure adequate adhesion.
- Choose a bulb diameter that will compress by about 20–40 percent when the sash closes; this gives a reliable weatherseal without making the window hard to operate.
- For snap-in profiles, make sure the leg thickness matches the slot; a loose fit will leak and a too-tight fit will be hard to install or damage the frame.
- For sliding units, opt for low-friction compounds and smaller bulbs to avoid sticking while preserving a seal.
Installation: trade tips and DIY steps
Whether you are a seasoned fitter or an experienced DIYer, correct preparation and installation are essential for a long-lasting seal.
- Remove old gasket and clean the channel: use a plastic scraper and an alcohol-based cleaner to remove old adhesive, dirt and paint. For timber frames, sand any rough paint build-up lightly.
- Dry-fit the gasket: cut lengths slightly longer than the run and press them into place to check profile and fit before final trimming.
- Mitering corners: use a sharp pair of snips and make 45-degree mitres for neat internal and external corners. For butt joints on long runs leave a small 1–2 mm gap to allow for thermal expansion.
- Use a lubricant sparingly: a little soapy water or a proprietary window gasket lubricant helps seat the bulb without damaging the material; do not use petroleum-based products as these can degrade rubber compounds.
- Seating: use a gasket roller or a soft mallet and a timber block to press snap-in legs into closed channels evenly; avoid overstretching adhesive-backed profiles when applying.
- Adhesive finishes: allow recommended cure times for any primer or adhesive; secure with temporary tape until fully set if necessary.
Common problems and how to avoid them
Most failures are avoidable with correct selection and installation.
- Brittle, cracked rubber: caused by UV or ozone exposure; select EPDM or silicone for external seals and replace aging seals proactively.
- Popping out of channel: usually due to incorrect leg size or a dirty channel; measure legs accurately and clean channels before fitting.
- Excessive rubbing or difficult operation: often a bulb that is too large; choose a smaller diameter or a lower durometer material to reduce friction.
- Leaks at corners: poorly cut mitres or insufficient compression; re-cut corners and ensure the bulb compresses uniformly.
Maintenance and long-term care
Regular maintenance extends the life of a bubble gasket and keeps windows functioning well.
- Clean seals twice a year with mild detergent and water; avoid abrasive tools.
- Apply a silicone-based lubricant or specialist rubber care product annually to keep the compound supple and reduce friction.
- Inspect for deformation, permanent set or cracking; replace any length that shows signs of failure rather than repeatedly trying to re-seat it.
- Store spare coils flat and out of direct sunlight; prolonged UV exposure will harden many compounds.
Compatibility with window systems and building regulations
Bubble gaskets are compatible with most uPVC, aluminium and timber systems, provided you select the correct profile and material. For new-build or replacement work, choose seals that support the required thermal performance and weather-resistance for the project. Always follow the frame manufacturer’s guidance when replacing seals on sealed units or warranty-protected systems; incorrect gaskets can affect warranty and acoustic performance.
Practical purchasing advice for tradespeople
Keep a small stock of popular sizes and a sample pack of materials to speed onsite decisions. Label coils with profile codes and install dates to track lifespan. When specifying for a client, include the material and expected performance: weather seals, acoustic improvement and expected lifetime in external exposure.
Recommended Products
Based on this article, you may find these products helpful:
- B003 Bubble Gasket
- B004 Bubble Gasket
- B007 Bubble Gasket
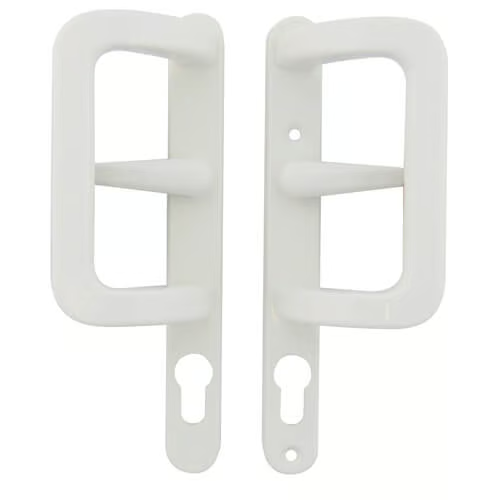
- Patio Door Handle Set - 92PZ White
- Winlock Patio Door Handle Set
Conclusion and next steps
Choosing the correct bubble gasket requires matching profile, material and size to the window system and the working environment. For straightforward replacements use careful measurement and good preparation; for new installations consult the frame manufacturer where necessary. If you need further technical information or samples, visit our pillar page at /guides/gaskets-seals or contact our trade support team for profile cross-references and fitting tools. Correct selection and professional installation will keep windows draught-free, watertight and easy to operate for years.