Draught-Proof Telescopic Letterboxes: Extra Insulation Options
Draught-Proof Telescopic Letterboxes: Extra Insulation Options Telescopic letterbox fittings are an excellent choice for modern timber, composite and alumi...
Draught-Proof Telescopic Letterboxes: Extra Insulation Options
Telescopic letterbox fittings are an excellent choice for modern timber, composite and aluminium doors because they adapt to different door thicknesses while keeping a neat external appearance. However, poorly sealed letterboxes can compromise thermal performance and let cold draughts, rain and noise through the front door. This post looks at practical insulation options you can combine with a telescopic letterbox to improve energy efficiency, security and comfort for UK homes; it includes trade tips and DIY guidance suitable for installers and competent DIYers.
Why draught-proofing a letterbox matters
A seemingly small aperture in a door can undermine insulation: cold air, wind-driven rain and noise all exploit gaps around the letterbox. For party walls and external doors the effect is measurable: heat loss through unsealed gaps increases heating demand and may create local cold spots that encourage condensation. Effective draught-proofing reduces heat loss, improves acoustic performance and prevents rain ingress that could rot a timber door or stain internal finishes.
How a telescopic letterbox works
A telescopic letterbox typically consists of a front plate and an inner plate joined by a telescopic shaft that expands to suit specific door thicknesses. The shaft forms the lining of the aperture; many models include an inner flap or cage for security. Because the unit sits within the thickness of the door, there are two critical sealing interfaces: between the outer plate and the door face; and internally, where the shaft meets the inner edge and flap. Correct fitment and additional sealing materials address both interfaces.
Practical insulation options
- Brush seals: High-density brush strips fitted around the flap perimeter or inside the shaft reduce draughts and noise while allowing mail to pass freely. Stainless steel or nylon filaments resist wear; choose trimmed-bristle profiles for minimal friction with the flap.
- EPDM or neoprene rubber gaskets: Thin-profile extrusion gaskets fitted between the letterbox plate and the door face provide a weatherproof seal. EPDM is resilient in UK temperatures and resists ozone and UV; neoprene offers good compression recovery. Use factory-profiled gaskets where possible for neat appearance.
- Closed-cell foam strips: For irregular gaps inside the shaft, closed-cell foam tape compresses to bridge voids and resists moisture. It is useful where the telescopic shaft does not sit perfectly flush to the door cut-out; choose self-adhesive grades with fire performance suitable for the aperture location.
- Brush-lined internal flaps or cages: Some telescopic units offer an internal brush-lined flap to restrict draughts without impeding mail. This is an effective, low-maintenance option that also offers acoustic benefits.
- Magnetic or rubber-lip seals: Magnetic seals are common on letterbox flaps where a close, repeatable shut is required; rubber-lip seals give a soft seal for tighter draught exclusion. Ensure magnets do not interfere with internal security features.
- Silicone or microcell sealant: Where the outer plate meets the door face, use a paintable silicone or appropriate microcell sealant to prevent water entry and close fine gaps. Avoid over-application that would prevent the plate sitting flush.
Trade and fitting advice
Accurate measurement and preparation are essential: measure the door thickness at the mounting location and select a telescopic model with sufficient adjustment range. Use the manufacturer’s template to mark the aperture and test-fit the unit before final fixings. Key trade tips:
- When cutting the aperture in timber or composite doors use a plunge router with a guide or a jigsaw with a fine blade to minimise splintering. Clamp a sacrificial board to the face if the finish is delicate.
- Where possible, dry-assemble the letterbox and mark where gaskets or foam will sit; this helps avoid excessive compression that restricts the flap.
- Use stainless steel or coated fixings to prevent rust stains; countersink screws neatly and use colour-matched caps where aesthetics matter.
- For external doors that require fire performance, check that any additional seals comply with the door’s fire rating and the manufacturer’s instructions; some seals are not suitable for fire doors.
- Order replacement seal kits for trade installs: fitting a new EPDM gasket and brush insert takes minimal time and improves performance for occupied properties.
DIY guidance for homeowners
If you are retrofitting a telescopic letterbox or adding seals yourself, follow these steps:
- Turn off any door closers and remove the existing letterbox carefully; keep screws and plates to use as a template.
- Measure door thickness and check the telescopic unit’s minimum and maximum range. Adjust before fitting to avoid external rework.
- Clean the fitting area and fit self-adhesive closed-cell foam to fill small gaps in the shaft; avoid over-thick tapes that will prevent the flap from operating smoothly.
- Fit brush seals around the internal opening using small screws or adhesive-backed channels. Trim brush length so the flap can move freely but still sweep the bristles.
- Seal the outer plate with a thin bead of paintable silicone; remove excess and allow to cure before painting. Test for smooth operation and no rubbing.
- Perform a draught check: on a windy day use a smoke pen or a tissue to detect airflow around the flap and inner edges; adjust seals accordingly.
Maintenance and troubleshooting
Regular maintenance keeps a telescopic letterbox working and insulating well. Every 6–12 months inspect brush seals for wear, clear debris from the shaft and ensure the flap closes squarely. Replace EPDM gaskets that show cracking or hardening; closed-cell foam that has compressed flat should be renewed. If water is tracking through the aperture after heavy rain, check for gaps between the outer plate and door; reinforce with sealant and ensure the external overhang is not obstructed.
Considerations for acoustics and security
High-density brush seals and internal flaps reduce noise; combining this with a secure internal cage limits the chance of fishing and increases thermal performance. Ensure the letterbox complies with EN 13724 aperture guidance for mail delivery; for premium security specify models with anti-fishing baffles and reinforced internal cages. Always balance insulation improvements with safe delivery: do not impede Royal Mail dimensions for letter acceptance.
Recommended Products
Based on this article, you may find these products helpful:
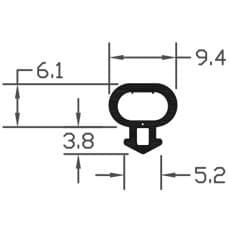
- E-Type Gasket - Black 5m Roll
- E-Type Gasket - Black (Per Metre)
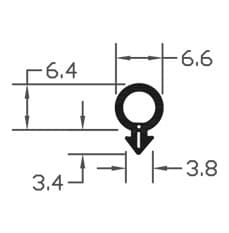
- B003 Bubble Gasket
- B004 Bubble Gasket
- B007 Bubble Gasket
Conclusion and next steps
Draught-proofing a telescopic letterbox improves thermal comfort, reduces heating costs and cuts noise; combining brush seals, EPDM gaskets and closed-cell foam gives a robust solution for most doors. For trade installations, plan measurements, order bespoke seal kits and follow manufacturer guidance; for DIY, take careful measurements, use appropriate tools and test before finishing. For detailed product options and fitting templates visit our pillar page at /guides/letterboxes or contact Window Hardware Store for technical support and seal kits for telescopic letterboxes.
Products mentioned in this article

Related articles
Internal vs External Letterbox Draught Excluders: Which Works Better?
Internal vs External Letterbox Draught Excluders: Which Works Better? A letterbox is a small opening that can let in a disproportionate amount of cold air,...
How to Retrofit an Anti Arson Letterbox to an Existing Door
How to Retrofit an Anti Arson Letterbox to an Existing Door What is an anti arson letterbox and why retrofit one? An anti arson letterbox is a specialist l...
Letterbox Draught Excluder for Security: Added Protection
Letterbox Draught Excluder for Security: Added Protection A well-chosen letterbox draught excluder reduces heat loss and noise while contributing to a stro...