Egress Hinge Installation: What Fitters Need to Know
Egress Hinge Installation: What Fitters Need to Know What an egress hinge is and when you need one An egress hinge is a specialised window hinge that allow...
Egress Hinge Installation: What Fitters Need to Know
What an egress hinge is and when you need one
An egress hinge is a specialised window hinge that allows the sash to open fully, or to a greater angle than a standard hinge, so that a person can escape through the aperture in an emergency. They are commonly used on ground-floor and first-floor escape windows, and on some doors where the opening needs to clear the frame so that a stretcher or rescuer can pass through. Fitters should treat egress hinges as both a safety and a functional component: they must provide reliable full travel, maintain weather performance, and not compromise security.
Regulation and compliance considerations
Before work begins, check the relevant Building Regulations and local building control requirements for escape openings. Manufacturers will provide guidance on the required clear opening dimensions; follow that guidance and any site-specific fire-safety instructions. For any certified or fire-rated escape route, confirm compatibility with the window or door manufacturer. If the installation affects means of escape for a habitable room, advise the homeowner or client to notify building control where required.
Choosing the correct hinge type
Select a hinge based on material, sash weight, opening direction and security needs. Typical options include:
- Stamped steel egress hinges with corrosion-resistant finish: cost effective and common for uPVC and timber.
- Cranked or adjustable egress hinges: allow fine adjustment in three axes; useful on heavier sashes and aluminium frames.
- Maintenance-free stainless steel versions: recommended in coastal or high-humidity environments.
Match the hinge size and rated load to the sash mass; always follow the manufacturer's load charts. If the sash is heavy or oversized, use more hinges or upgrade to a higher-rated model.
Pre-installation checks and tools
Carry out these checks before you start cutting or drilling:
- Verify sash weight and dimensions against hinge capacity.
- Inspect the frame material: timber, uPVC, aluminium or composite; choose fixings accordingly.
- Ensure there is sufficient reveal and backset for the hinge geometry to allow full opening.
- Confirm there are no obstructions on the external face that will prevent full travel.
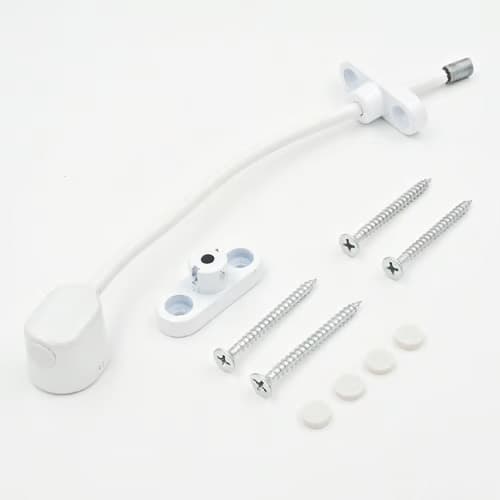
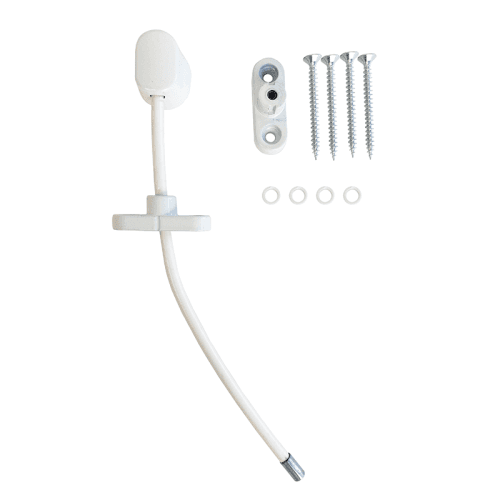
Essential tools and materials include: cordless drill with correct bits, torque-controlled screwdriver, stainless steel or manufacturer-specified screws, spirit level, set squares, packing shims, silicone sealant, threadlocker where recommended, and safety equipment. For large or awkward sashes, have an assistant or use suction cups to support the glass during installation.
Step-by-step installation
Follow this sequence for a reliable fit:
- Prepare the workspace and support the sash in a safe, stable position. Release any restrictors and disengage locking mechanisms.
- Mark hinge positions using manufacturer templates. Typical locations are top and bottom corners; heavier sashes often require a third hinge mid-height.
- Pilot-drill holes to the correct diameter and depth for the chosen screws; this avoids splitting timber and reduces stress on uPVC frames.
- Fix the hinge to the frame first, using packers where required to maintain alignment. Tighten screws gradually and evenly; do not over-torque.
- Attach the sash leaf of the hinge. Check sash alignment and adjust any provision on the hinge to centre the sash within the frame. Adjustable hinges allow lateral, vertical and compression adjustments; use these to ensure proper seals and smooth operation.
- Test full travel: open the sash to the full egress position and check for rubbing, binding or water ingress risk. Verify the sash clears the frame and any external obstructions.
- Reinstall locking gear and check engagement; ensure multipoint locks operate correctly with the sash in the closed position.
- Seal any disturbed joints, replace glazing beads if removed, and check perimeter seals for weatherproofing.
Security, restrictors and child safety
Egress hinges must not create a security weak point. For outward-opening units, use hinge designs with non-removable pins or security screws. For inward-opening windows, ensure that anyone fitting restrictors understands that a restrictor must not prevent emergency escape; regulatory guidance generally requires that restrictors can be overridden quickly from the inside in an emergency. Discuss with the homeowner whether child-safety restrictors are needed; if fitted, they should be easily releasable and clearly labelled.
Common problems and how to avoid them
Typical issues and trade solutions:
- Misalignment causing poor sealing: adjust the hinge in three axes; use shims where necessary but avoid creating concentrated loads on the frame.
- Sash binding at full open: check for obstructions and confirm hinge backset; replacing with a hinge of different geometry may be required.
- Fastener failure in uPVC: use thread-forming screws specified for uPVC or fit steel reinforcing plates where recommended by the manufacturer.
- Corrosion in coastal sites: specify marine-grade stainless steel hinges and fixings.
Maintenance and handover
Advise clients to carry out simple maintenance every six to 12 months: lubricate pivot points with a light machine oil, check screws for tightness and remove any debris that could interfere with full travel. For trade customers, document the hinge type, serial number if present, and the adjustment settings; include this information in the handover pack. Demonstrate how to operate the egress function safely, and explain when and how restrictors can be released.
Further reading and specification
For more detailed hinge selection and technical drawings see our pillar guide on window hinges at /guides/window-hinges. For any installation that interacts with means of escape or fire-safety measures, consult the relevant Building Regulations and the window or door manufacturer's technical documents. When in doubt, contact the hinge manufacturer or a structural glazing specialist for confirmation.
Recommended Products
Based on this article, you may find these products helpful:
- Top-Hung Window Hinge - Standard
- Side-Hung Window Hinge - Standard
- Top Hung Friction Stay - 12"
- UAP Keyless Window Restrictor
- TSS Keyless Cable Window Restrictor
Conclusion and next steps
Proper egress hinge installation combines correct product selection, accurate setting out, secure fixings and careful adjustment. Fitters should plan the job, confirm compliance requirements, and use the right tools and fixings for the frame material. Homeowners should expect a demonstration and written maintenance advice at handover. For your next step: check the hinge specification for your sash weight, download the manufacturer's template, and order the appropriate fasteners and corrosion-resistant finishes before arriving on site.