Telescopic Letterbox Installation Problems and Solutions
Telescopic letterbox installation problems and solutions are common for both trade professionals and DIY homeowners; choosing the correct product and fitti...
Telescopic letterbox installation problems and solutions are common for both trade professionals and DIY homeowners; choosing the correct product and fitting it correctly will avoid draughts, security issues and damage to the door. This article covers typical faults, practical fixes and trade-level tips for timber, composite, UPVC and aluminium doors.
Common problems with telescopic letterbox installations
- Incorrect sizing: telescopic sleeves that are too short or too long for the door thickness, causing misalignment between inner and outer plates.
- Poor weather performance: gaps around the sleeve allow rain and wind to enter, or a lack of drip prevention leads to water ingress.
- Rattling or movement: the inner flap or telescopic sleeve moves when the door is used or in wind; fixings pull out over time.
- Security concerns: the aperture can be used to manipulate internal locks, or screws are exposed and easy to remove.
- Damage to the door: incorrect cutting methods or fitting on a fire-rated door can weaken the door structure and void warranties.
- Misalignment between inner and outer boxes: letters catch or jam if the internal tray does not line up with the outer plate.
Pre-installation checks and measurements
Before cutting or ordering parts, complete these checks: identify the door type; check whether the door is fire-rated or warranty-protected; measure finished door thickness accurately; check the manufacturer’s specified telescopic range, for example 40–60mm or 60–100mm, and choose a product that covers that range. Determine the preferred height for the letterbox: common practice in the UK is to position the centre between 900mm and 1100mm from finished floor level, but follow any client or accessibility requirements.
Tools, materials and trade kit
- Masking tape and pencil for marking; templates supplied by manufacturers.
- Drill with wood and metal bits; hole saws or spade bits for pilot holes.
- Jigsaw or router for neat internal cut-outs; use sharp blades and clamping to avoid splintering.
- Stainless steel screws, packers or backing plates, silicone sealant and EPDM gaskets for weatherproofing.
- Backing blocks or long screws for UPVC and hollow-core doors; specialist fixings for aluminium.
- Protective equipment: goggles and dust mask.
Step-by-step installation tips
Follow these practical steps for a reliable fit:
- Use the manufacturer’s template: position it accurately and stick a strip of masking tape to reduce chip-out when cutting.
- Drill pilot holes at the corners of the template, then cut the aperture with a jigsaw or router; support the door and clamp if possible to avoid flexing.
- Test fit the outer face plate and the telescopic sleeve without sealant; extend the sleeve to verify both inner and outer plates line up flush on either side.
- If the sleeve is adjustable, set it to the correct length then lock using the grub screws or retaining clips provided; ensure there is minimal axial play but allow slight movement for thermal expansion.
- Apply an EPDM gasket or silicone bead around the sleeve to prevent draughts and water ingress; for external plates consider a small drip cowl or hood if the product does not include one.
- Secure with stainless steel screws; where the door material is thin or hollow, use backing plates or packers on the opposite face to distribute loads and prevent screw pull-through.
Door-type specific considerations
Different door materials need different approaches:
- Timber doors: glue and screw into timber; seal cut edges with paint or preservative to prevent moisture uptake; avoid over-tightening screws which can split the timber.
- Composite doors: many manufacturers require factory-fitted letterboxes; check the door warranty. If field-fitted, use the manufacturer’s approved kit and long through-bolts to engage the internal reinforcement.
- UPVC doors: these are often hollow with internal reinforcement strips; use long screws into the reinforcement or fit backing plates; avoid cutting through reinforcement unintentionally.
- Aluminium doors: use appropriate metal-cutting blades and offer corrosion protection; use pan-head stainless screws and rubbers to insulate against galvanic corrosion.
- Fire doors: do not modify without consultation; cutting a new aperture can void certification. Use certified solutions or alternative locations.
Troubleshooting common faults
Quick fixes for issues encountered after fitting:
- Letters snagging between inner and outer plates: check sleeve length and shim using thin washers or packing behind plate flanges; ensure both plates are square to the door face.
- Wind noise or rattling: fit foam strips or brush seals to the inner flap; tighten fixings; add rubber buffers to flap edges.
- Water ingress: re-seal with a continuous bead of exterior-grade silicone; add an external drip cowl or adjust the outer plate so water is shed away from the aperture.
- Screws pulling out: replace with longer screws engaging reinforcement or fit internal backing plates; for UPVC fit into the reinforced section only.
- Security vulnerabilities: fit anti-fishing plates, internal letterboxes with tray baffles, or a hinged internal box; consider a security grade lock for the door if required.
Trade tips for a professional finish
- Always use stainless fixings to prevent staining and corrosion; match screw heads to the plate for a neat finish.
- When fitting multiple doors, create a simple CNC or jig template for identical repeat cuts; this saves time and improves quality control.
- Keep a range of sleeve lengths and backplates on the van to avoid repeat visits; stock common telescopic sizes used locally.
- Document any manufacturer-specific requirements for warranties or fire-rated doors and communicate these to the client in writing.
Recommended Products
Based on this article, you may find these products helpful:
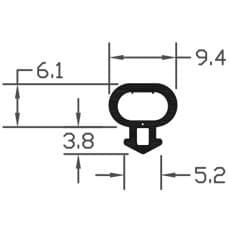
- E-Type Gasket - Black 5m Roll
- E-Type Gasket - Black (Per Metre)
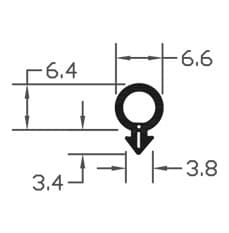
- B003 Bubble Gasket
- B004 Bubble Gasket
- B007 Bubble Gasket
Conclusion and next steps
Problems with a telescopic letterbox are usually down to incorrect sizing, inadequate sealing or improper fixing for the door type. Carry out pre-install checks, use the correct tools and fixings, and follow door manufacturers’ instructions; for fire doors always consult the certifying body before modification. If you need detailed product guidance or recommended kits for timber, composite, UPVC or aluminium doors, visit our pillar page: /guides/letterboxes or contact Window Hardware Store for trade pricing and technical support.
Products mentioned in this article

Related articles
Internal vs External Letterbox Draught Excluders: Which Works Better?
Internal vs External Letterbox Draught Excluders: Which Works Better? A letterbox is a small opening that can let in a disproportionate amount of cold air,...
How to Retrofit an Anti Arson Letterbox to an Existing Door
How to Retrofit an Anti Arson Letterbox to an Existing Door What is an anti arson letterbox and why retrofit one? An anti arson letterbox is a specialist l...
Letterbox Draught Excluder for Security: Added Protection
Letterbox Draught Excluder for Security: Added Protection A well-chosen letterbox draught excluder reduces heat loss and noise while contributing to a stro...