How to Fit a Deadbolt to a Wooden Door: DIY Guide
How to Fit a Deadbolt to a Wooden Door: DIY Guide Why fit a deadbolt? A deadbolt adds a significant level of security to an external timber door by resisti...
How to Fit a Deadbolt to a Wooden Door: DIY Guide
Why fit a deadbolt?
A deadbolt adds a significant level of security to an external timber door by resisting forced entry and preventing latch manipulation. For UK homeowners and trade professionals, the correct deadbolt will also meet insurance requirements and integrate with existing hardware. Choose the right type and fit it correctly to avoid draughts, misalignment and premature wear.
Tools and materials
- Pencil, tape measure and square
- Centre punch or awl
- Electric drill and a selection of bits (brad-point, twist bits, countersink)
- Mortice chisel set and mallet; alternatively a plunge router and jig for traders
- Screwdrivers or powered screwdriver with correct bits
- Router or wood plane if adjusting rebated doors
- Long wood screws (at least 60–80mm) for strike plate fixing
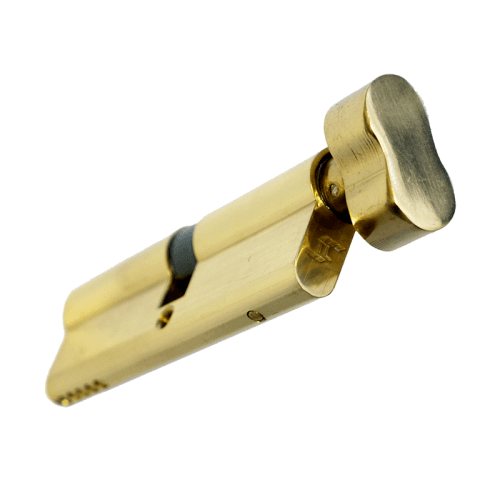
- Deadbolt of appropriate type and size, compatible cylinder if required
- Strike plate and frame reinforcement kit (optional but recommended)
- Safety goggles and hearing protection
Choosing the right deadbolt
Select a deadbolt type that suits the door and the security level required: a surface-mounted deadbolt is easier to fit to an existing door, while a mortice deadbolt gives a more secure, concealed installation. For external doors choose locks that meet recognised standards: a 5-lever mortice deadlock to BS3621 is often required by insurers; for cylinder locks consider TS007 or Sold Secure rated cylinders. Match the deadbolt to door thickness and frame construction.
Preparation and critical measurements
Accurate marking is the foundation of a neat, secure installation. Decide the vertical position of the deadbolt: typically this is above the handle or existing lock, at a comfortable height for operation and at least one bolt throw away from glass panels. Measure the door thickness and the backset: the backset is the distance from the door edge to the centre of the key or spindle. Common backsets are 35mm, 45mm and 60mm; check the deadbolt specification and pick the correct backset.
- Measure door thickness at the location you will fit the lock; order a cylinder length to suit the thickness where applicable.
- Transfer the centre line around the face and edge of the door; use a square to keep lines perpendicular.
- Check the frame where the bolt will engage; ensure there is adequate timber to take long screws for the strike plate.
Fitting a mortice deadbolt: step-by-step
Mortice deadlocks require cutting a pocket in the door edge to accept the lock case and drilling for the cylinder or key mechanism. Follow manufacturer dimensions closely.
- Mark the outline of the lock case on the door edge using the template supplied. Transfer the centre for the cylinder or keyway to both faces of the door.
- Drill relief holes along the marked mortice to the depth of the lock case. Traders commonly use a plunge router and a mortice jig for speed and neatness; DIYers can remove material with successive chisel cuts for a clean finish.
- Chisel to the exact depth so the lock case sits flush. Check that the faceplate sits level and mark where to recess the faceplate; chisel a neat rebate for the faceplate so it is flush with the edge.
- Drill the through-hole(s) for the cylinder or spindle using the correct size bits or hole saw specified by the lock maker. Ensure the hole is square to the door face; slight misalignment can bind the key or operation.
- Fit the lock case into the mortice and fix the faceplate with screws. Fit the cylinder and check operation by turning the key; make any minor adjustments to the mortice if the bolt jams.
- Mark and fit the strike plate on the frame: mortice the frame if required so the plate sits flush. Use long screws that penetrate the frame and, ideally, the stud behind the jamb for reinforcement.
Fitting a surface-mounted deadbolt
Surface-mounted deadbolts attach to the face of the door and are usually simpler to install on existing doors. They are a good option for retrofits.
- Position the deadbolt on the door face and mark the fixing holes and the position of the bolt on the frame.
- Drill pilot holes for the screws and for any connecting spindle or fixing rod. If a separate keeper is required on the frame, chisel a shallow rebate so the bolt sits flush when locked.
- Fix the lock to the door and the keeper to the frame with appropriate screws. Reinforce the keeper with additional fixings or a metal reinforcement plate behind the frame timber if the frame is lightweight.
- Test operation several times; if it binds, check alignment and pack the keeper as required. Ensure there is clearance for weatherstrips.
Finishing, testing and practical trade tips
Once the deadbolt is fitted, work through a series of checks:
- Operate the key and thumbturn many times to bed the mechanism; lubrication with a dry graphite or a light lock lubricant will ensure smooth action. Avoid oil-based aerosols long term as they attract grit.
- Check door closing under natural conditions: test after adding weatherseals, at different temperatures and after a few months to allow for timber movement.
- Use long screws for the strike plate and hinges; 60–80mm screws that penetrate into the frame stud significantly increase resistance to forced entry.
- For trade fittings: consider a router and purpose jig for repeatability; pre-drill screw pilot holes to avoid splitting softwoods; always clean out chips from mortices before final assembly.
Safety, fire doors and compliance
Do not alter a certificated fire door without confirming alternative approved hardware and maintaining the fire rating. Many fire doors require specific mortice locks and intumescent seals; check the door label and relevant regulations. For insurance compliance, fit locks that meet the required British Standards and record make, model and installation date. Always wear eye protection when chiselling or routing and take care when drilling close to glass panels or wiring.
Recommended Products
Based on this article, you may find these products helpful:
- In-Line Window Mechanism
- Offset Window Mechanism
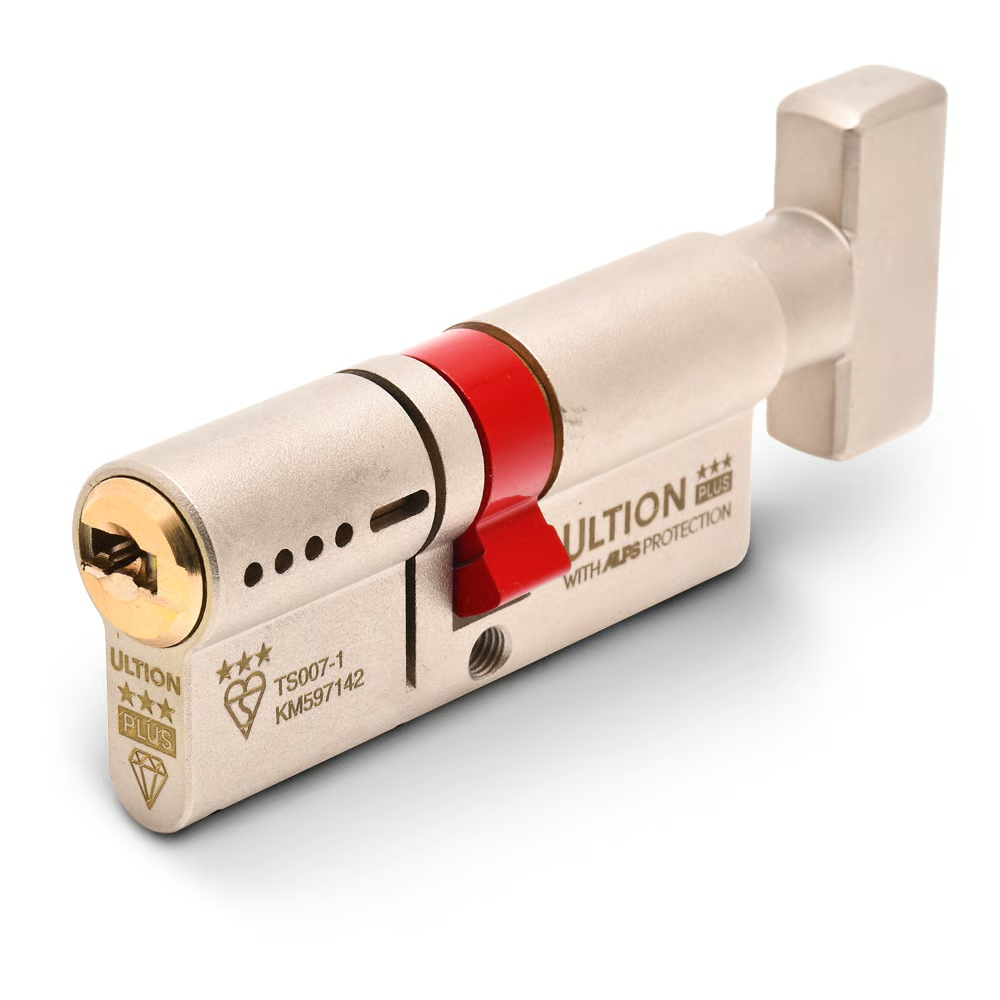
- TL Thumb Turn Euro Cylinder
- Ultion Plus TS007 3* Kitemarked Euro Key & Turn Cylinder
- E-Type Gasket - Black 5m Roll
Conclusion and next steps
Fitting a deadbolt to a wooden door is a straightforward job for competent DIYers and a routine task for tradespeople when the correct tools, measurements and standards are observed. Choose the appropriate deadbolt type and rating, measure carefully, cut neat mortices or fit surface units precisely, and reinforce the frame with long screws. If the door is a fire door, or if you are unsure about regulatory or insurance requirements, consult a specialist.
For further reading on compatible locks, cylinders and frames, see our wider resources at /guides/door-locks or contact Window Hardware Store for trade advice and recommended products.


Related articles
uPVC Door Lock Maintenance: Keep Your Lock Working Smoothly
uPVC Door Lock Maintenance: Keep Your Lock Working Smoothly A well maintained upvc door lock reduces call-outs, keeps a property secure and extends the lif...
Hook Lock Sizes and Compatibility: Matching Your Existing Lock
Hook Lock Sizes and Compatibility: Matching Your Existing Lock Replacing a hook lock can be straightforward if you know what to measure and what to check f...
Replacing Individual Hook Locks vs Full Multipoint Mechanism
Replacing Individual Hook Locks vs Full Multipoint Mechanism Deciding whether to replace a single hook lock or the entire multipoint mechanism is a common ...