
How to Prepare Surfaces for Draught Seal Installation: Getting Adhesion Right
How to Prepare Surfaces for Draught Seal Installation: Getting Adhesion Right Proper surface preparation is the single most important factor for long-lasti...
How to Prepare Surfaces for Draught Seal Installation: Getting Adhesion Right
Proper surface preparation is the single most important factor for long-lasting draught seal performance. Whether you are fitting self-adhesive foam to a timber front door, installing compression gaskets into a PVCu window frame, or bonding a silicone bulb seal to an aluminium threshold, correct cleaning, repair and priming will determine adhesion and longevity. The following practical advice covers both trade professionals and confident DIYers working on typical UK windows and doors.
Why surface preparation matters
Poor adhesion leads to early failure: peeling edges, trapped dust reducing sealing efficiency, and water ingress that can cause rot or corrosion. Many seal failures are not due to the gasket material itself but to inadequate surface condition. Preparing surfaces correctly reduces callbacks, improves thermal performance and ensures the draught seal performs to its specified life expectancy.
Inspect the substrate first
Begin with a thorough inspection: identify the substrate type and condition before choosing adhesive products or preparation methods. Common surfaces include:
- PVCu and plastic window frames
- Painted timber and primed wood
- Timber bare or planed surfaces
- Aluminium and powder-coated metal
- Masonry, concrete and stone thresholds
Note any flaking paint, loose putty, oil, rust, heavy contamination, or high moisture content. For timber, check moisture content where possible; ideally it should be below 15 percent for internal seals and 12 percent for exposed joinery.
Cleaning and degreasing: the basic essentials
Adhesives stick best to clean, dry, oil-free surfaces. Use the right cleaner for the substrate:
- General dirt and dust: wipe with a damp cloth then dry; finish with a lint-free cloth.
- Grease and oily residues: use isopropyl alcohol or white spirit; test on a small area for painted finishes first.
- Silicone or old adhesive residues: specialist silicone remover or acetate-based cleaner; follow manufacturer safety guidance.
- Porous masonry: brush or blow out dust then apply a suitable primer or consolidant; do not rely on surface wiping alone.
Always use clean, lint-free cloths and allow sufficient drying time. Avoid household detergents that leave residues unless they are fully rinsed and the surface is dry.
Removing old sealant and loose material
Old rubber strips, softened mastic and residual adhesive must be removed to a firm edge. Methods include:
- Mechanical scraping with a plastic or metal scraper; protect surrounding paint and glass.
- Light abrasion with abrasive pads or sandpaper: use 80–120 grit for timber; finer for powder-coated aluminium to avoid damage.
- Heat gun to soften old adhesives where appropriate; use with caution on PVCu and painted timber to avoid warping or scorch marks.
- Chemical removers for stubborn residues; follow COSHH guidance and manufacturer instructions.
After removal, sand or abrade to a uniform surface and remove dust with a vacuum or tack cloth.
Repairing, filling and ensuring a stable substrate
Repair holes, rot and gaps before sealing. For timber, use suitable wood filler and sand flush when cured. For mortar joints and masonry, use a compatible cementitious or polymer-modified filler. Avoid applying self-adhesive draught seal over unstable or friable repairs; allow full cure time.
If a rebate or groove is worn, consider replacing the gasket or using a backing strip to provide a clean, solid surface for adhesion. Screws, hinges and ironmongery should be secure; movement will compromise any bonded draught seal.
Primers and adhesion promoters: when to use them
Certain low-energy surfaces require a primer to achieve reliable bond: PVCu, powder-coated aluminium, some silicone sealants and certain plastics. Adhesion promoters are usually recommended by the seal or adhesive manufacturer. Key points:
- Follow the gasket manufacturer’s data sheet for recommended primers and application method.
- Apply primer thinly and evenly; allow specified flash-off time and ensure the surface is dry before fixing the seal.
- Some pressure-sensitive adhesives (PSA) come with a higher tack backing; these still benefit from a primer on difficult substrates.
Temperature, humidity and timing
Install adhesives and self-adhesive seals in recommended temperature ranges; typically between 5°C and 30°C for most tapes and sealants. Cold surfaces reduce tack and slow curing; high humidity can affect moisture-sensitive adhesives. Also consider the surface temperature relative to the dew point: condensation on the surface will prevent adhesion.
New paint or varnish must be fully cured before bonding; a minimum of 24–48 hours is common but high-gloss and specialist coatings may need longer. When in doubt, consult the coating supplier.
Practical step-by-step checklist
- Identify substrate and check moisture content if timber is involved.
- Remove old seals and any loose material; sand or abrade to sound surface.
- Clean with appropriate solvent: isopropyl alcohol for general use; specialist removers for silicone.
- Allow the surface to dry fully; use a tack cloth to remove remaining dust.
- Apply primer where required; observe manufacturer flash-off time.
- Fit the draught seal, applying even pressure and avoiding stretching the material.
- Check edge adhesion and run a roller over pressure-sensitive strips for improved contact.
Installation tips and ongoing maintenance
When installing self-adhesive draught seals, try to apply in one continuous length where possible to avoid butt joints that trap dirt. Trim ends square and, for external applications, consider mechanical fixing or sealant at joints to resist wind uplift. For compression gaskets, ensure the profile compresses to manufacturer tolerances to avoid undue wear.
Perform a post-installation check after 24–48 hours; look for lifting edges and re-press where necessary. Regular cleaning and inspection every 6–12 months prolongs life and maintains weather performance.
Further reading and product guidance
For more on gasket selection and the different types of seals available for windows and doors consult our pillar page: gaskets & seals. Always follow manufacturer technical data sheets for primers, adhesives and seal materials for the best results.
Recommended Products
Based on this article, you may find these products helpful:
- E-Type Gasket - Black 5m Roll
- E-Type Gasket - Black (Per Metre)
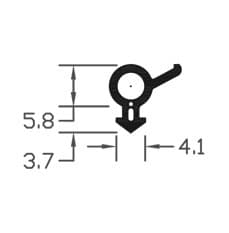
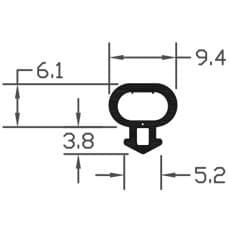
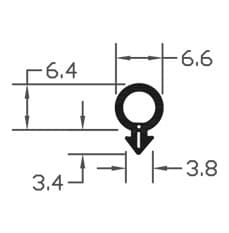
- B003 Bubble Gasket
- B004 Bubble Gasket
- B007 Bubble Gasket
Conclusion and next steps
Getting adhesion right starts with inspection, followed by cleaning, repair and priming where appropriate. Use the correct cleaners, abrasive techniques and primers for the substrate you are working with; pay attention to temperature and moisture conditions. For trade professionals, standardise your preparation routine to reduce failures; for homeowners, tackle small jobs methodically and seek specialist help for structural repairs or uncertain substrates.
Next steps: identify the substrate you will be sealing, consult the gasket manufacturer’s installation guidance, and gather the right cleaning materials, primers and PPE before you begin. If you need help selecting a specific draught seal or adhesive, contact Window Hardware Store for technical advice and product recommendations.
Products mentioned in this article
Related articles
Draught Seal Types Compared: Foam, Rubber, Brush, and Compression
Draught Seal Types Compared: Foam, Rubber, Brush, and Compression Draught seal selection matters for energy efficiency, comfort, and the longevity of windo...
How to Draught-Proof Victorian Windows Without Replacing Them
Victorian sash windows are a defining feature of many UK homes; they also tend to be a major source of heat loss and cold draughts. Replacing them with new...
How to Fit Draught Seals Around Windows: Complete Installation Guide
How to Fit Draught Seals Around Windows: Complete Installation Guide Fitting a draught seal is one of the most cost-effective ways to reduce heat loss, eli...