
The Best Draught Seals for Old Sash Windows: Heritage-Friendly Options
The Best Draught Seals for Old Sash Windows: Heritage-Friendly Options Why a good draught seal matters for sash windows Traditional timber sash windows are...
The Best Draught Seals for Old Sash Windows: Heritage-Friendly Options
Why a good draught seal matters for sash windows
Traditional timber sash windows are beautiful, but they are often a source of heat loss and cold draughts. Installing the right draught seal improves thermal comfort, reduces energy bills and limits wind noise while keeping the window appearance sympathetic to the original design. For homeowners and tradespeople working on historic or listed properties, choosing a heritage-friendly draught seal is about balancing performance with reversibility and minimal intervention to original fabric.
Where sash windows usually leak
- Around the perimeter where the sash meets the frame: the staff beads and rebates are common routes.
- At the meeting rail between the top and bottom sash: poor contact allows cold air in.
- At the sill and apron: gaps between the lower sash and sill allow draughts.
- Through worn sash cords and ill-balanced weights: poor sealing due to misalignment and sticky operation.
Heritage-friendly draught seal options
Not all draught seal types suit old sash windows. Below is a practical list with pros and cons to help select the best option for a given job.
- Brush pile (pile weatherstrip): Narrow pile strips are the default choice for conservation work. They sit discreetly in the staff bead or on the sash stile; they are flexible, quiet in operation and reversible. Choose a low-profile pile for minimal sightline intrusion. Best for: sash-perimeter sealing and meeting rails.
- EPDM compression strips: Durable rubber that compresses to form a tight seal. Available in small rectangular or bulb profiles. Good weathering performance; installed into a shallow groove or mechanically retained in an aluminium channel. Best for: areas where a slightly firmer seal is acceptable and visibility is less critical.
- Silicone bulb seals: Soft, resilient and long lasting. Bulb seals give excellent compression and spring back well around irregularities. They can be fitted to meeting rails to prevent draughts at the sash junction. Best for: meeting rails and heavy-use sashes that need a reliable cushion.
- Aluminium retainer with pile or rubber insert: Mechanical retainers screw into a new or replacement staff bead; they allow removable strips so the original timber can be preserved and work is reversible. Best for: situations where conservation officers expect non-invasive fixes.
- Foam tape: Cheap and quick; however, foam is low durability and unsightly on traditional frames. Use only as a temporary measure or in concealed areas. Not recommended for principal elevations.
- Spring bronze or metal weatherstrips: Effective for casements and modern frames. For timber sash windows they can be noisy, abrasive and visually intrusive; generally not ideal for heritage sash unless purpose-designed and agreed with conservation guidance.
Trade and DIY fitting advice
Whether you are a homeowner tackling a DIY draught-proofing weekend or a tradesperson on a contract, follow these practical steps:
- Inspect and prepare: check for rot, loose beads and paint build-up. Replace rotten staff beads and re-balance sashes before fixing new seals; no seal will perform well if the window is out of true.
- Measure twice: account for sash travel and expected compression. For pile and bulb seals allow 3 to 5mm compression; too tight a seal will impede operation.
- Choose the installation method: adhesive-backed pile can be stuck to cleaned, dry timber for a reversible, low-impact fix. For longer life, use aluminium retainers that are screw-fixed into a replacement staff bead or into a discreet rebate.
- Grooving and routing: where a groove is required for an EPDM or bulb, cut only into new or replacement mouldings. Use a small beading router bit and test depth on scrap timber to avoid damaging historic mouldings.
- Fixing: use stainless steel or brass countersunk screws on aluminium retainers to prevent staining. For adhesive-backed products, degrease and lightly abrade the surface; warm backing film slightly with a hairdryer to aid adhesion in cold weather.
- Test operation: close and open the sash several times during fitting. Adjust or trim where seals catch the paint or binding occurs. Re-paint any exposed new timber with breathable paint systems recommended for joinery.
Tools and materials checklist
- Measuring tape, pencil, straightedge
- Small router or beading plane for grooves; chisels for careful trimming
- Stainless steel/brass screws; countersink bit
- Adhesive-backed pile or pre-cut EPDM/silicone seals
- Aluminium retainers if mechanical fixing is preferred
- Cleaning solvents (methylated spirit), sandpaper, paint for finishing
Maintenance and expected lifespan
Quality pile and EPDM seals last several years; silicone bulbs can last longer if not exposed to constant UV or abrasion. Regular maintenance extends life: wipe seals clean, check for looseness, and replace worn strips rather than over-painting them. For commercial or high-use properties inspect annually and replace before seals fail completely.
Conservation and listed building considerations
For listed buildings or properties in conservation areas discuss proposed draught-proofing with the local conservation officer if there is any doubt. Preferred interventions are reversible and avoid cutting into original mouldings. Where possible fit seals into replacement staff beads rather than altering historic fabric; document any changes and retain removed original components where feasible.
Recommended Products
Based on this article, you may find these products helpful:
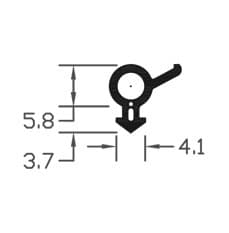
- E-Type Gasket - Black 5m Roll
- E-Type Gasket - Black (Per Metre)
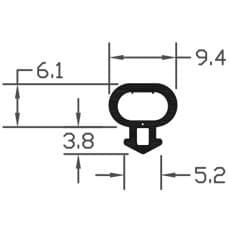
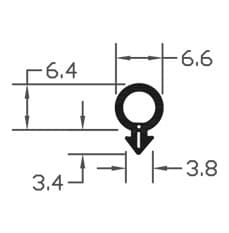
- B003 Bubble Gasket
- B004 Bubble Gasket
- B007 Bubble Gasket
Conclusion and next steps
Choosing the correct draught seal for old sash windows depends on the degree of conservation sensitivity, the desired performance and the sash condition. For most heritage sash the first choices are narrow brush pile in a retrievable retainer or discreet EPDM compression strips fitted into a replacement staff bead. Tradespeople should prepare by checking sash balance and planning reversible fixes; DIYers should focus on cleaning, measuring accurately and starting with adhesive-backed pile if a low-impact solution is required.
Next steps: assess your sash windows for rot and balance, measure the staff bead and meeting rail gaps, and select a seal type suited to the elevation. For more on gaskets and seals see our pillar resource: /guides/gaskets-seals. If in doubt on listed building works contact your conservation officer or a specialist sash window draught-proofing contractor.
Products mentioned in this article
Related articles
Draught Seal Types Compared: Foam, Rubber, Brush, and Compression
Draught Seal Types Compared: Foam, Rubber, Brush, and Compression Draught seal selection matters for energy efficiency, comfort, and the longevity of windo...
How to Prepare Surfaces for Draught Seal Installation: Getting Adhesion Right
How to Prepare Surfaces for Draught Seal Installation: Getting Adhesion Right Proper surface preparation is the single most important factor for long-lasti...
How to Fit Draught Seals Around Windows: Complete Installation Guide
How to Fit Draught Seals Around Windows: Complete Installation Guide Fitting a draught seal is one of the most cost-effective ways to reduce heat loss, eli...