Deadbolt Installation Tips: Avoiding Common Mistakes
Deadbolt Installation Tips: Avoiding Common Mistakes Installing a reliable deadbolt adds real security to a door, but mistakes in measurement, alignment or...
Deadbolt Installation Tips: Avoiding Common Mistakes
Installing a reliable deadbolt adds real security to a door, but mistakes in measurement, alignment or product choice can undermine performance and void insurance. This article covers practical advice for UK homeowners and trade professionals: what to check before you start, common errors to avoid, and step-by-step tips for a secure and durable installation. Relevant detailed guidance and related products are also available on our pillar page: /guides/door-locks.
Know the types and regulations
First, identify which deadbolt is appropriate for the door and the situation. Typical options include:
- Mortice deadlocks: recessed into the door; common for timber doors and available to BS3621 standard for insurance purposes.
- Rim deadbolts: surface-mounted on the inside face; useful for additional internal security or garage doors.
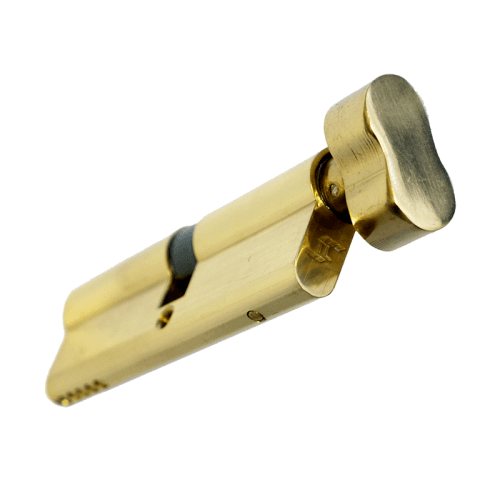
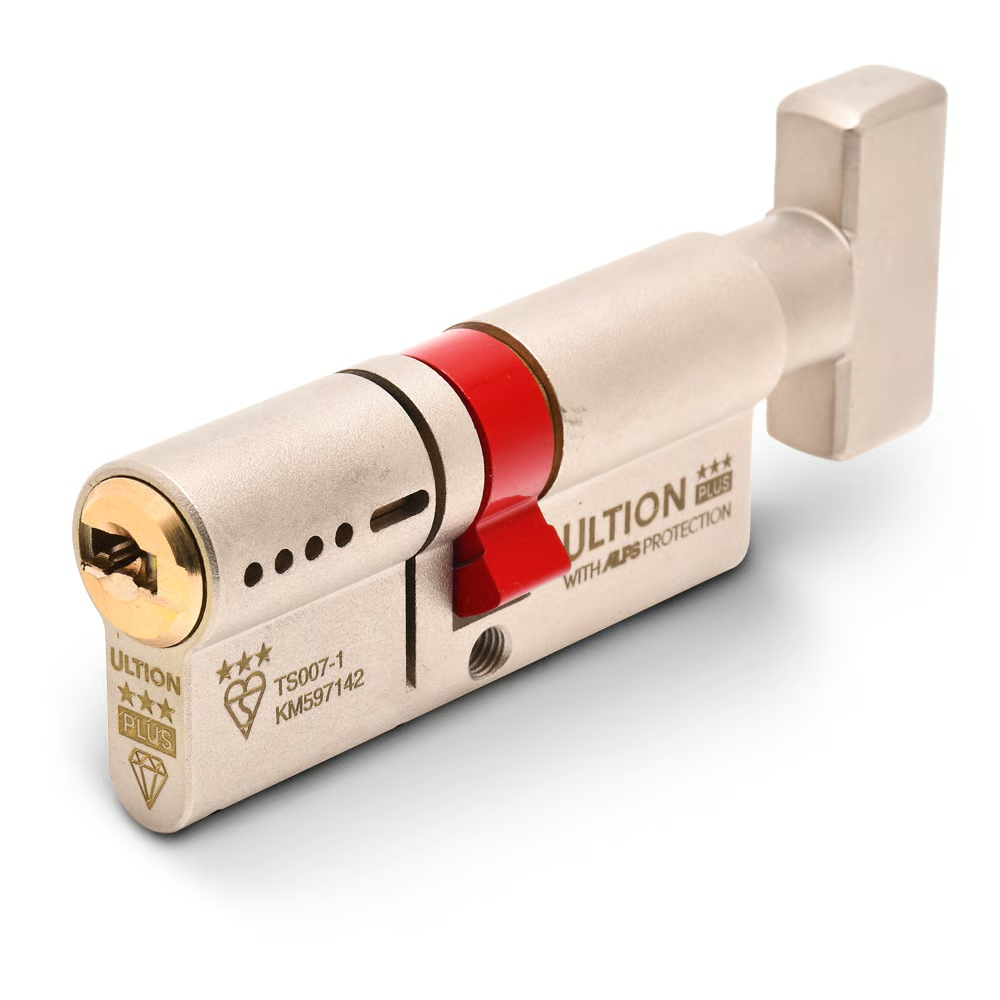
- Euro-profile single or double cylinders with a deadbolt function: widely used on uPVC and composite doors, but choose anti-snap, anti-bump fittings for external doors.
Be aware of fire-door regulations: do not fit non‑approved locks to certified fire doors; consult the door manufacturer and use fire-rated hardware where required.
Common mistakes to avoid
- Wrong backset and cylinder length: failing to measure the backset (distance from door edge to cylinder centre) or cylinder length leads to protruding cylinders or inability to fit the lock correctly.
- Undermining the frame: using short screws in the strike plate or not reinforcing a weak frame reduces resistance to forced entry.
- Poor alignment: misaligned bolt and strike cause heavy operation and premature wear; this is often due to rushed marking or inadequate marking templates.
- Incorrect fixings for material: using wood screws in masonry, or standard screws into uPVC without appropriate anchors, will fail.
- Modifying multipoint systems without checking manufacturer guidance: this can void guarantees and compromise weather and security performance.
- Using non-rated cylinders on external doors: euro cylinders without anti-snap protection can be easily attacked; TS007 3-star or equivalent is recommended for external doors.
Preparation: measurement and assessment
Good prep is half the job. Measure and inspect before cutting:
- Door thickness: most deadbolts expect 44mm to 54mm timber thickness, but confirm. For thinner or thicker doors choose a suitable case or spacer kits.
- Backset: common backsets are 35mm, 40mm and 45mm; use the lock template to confirm centre positions for the lock case and cylinder.
- Frame condition: check for rotten or cracked timber; reinforce with a steel plate or hardened strike box if necessary.
- Handing and layout: determine whether the lock is reversible; mark use of hinges so the bolt projects into the correct face of the jamb.
Tools, templates and technique
Use the right tools and follow a measured sequence:
- Tools: centre punch, tape measure, combination square, drill with wood and metal bits, Forstner or spade bits for large holes, router or chisel set for mortices, countersink, screwdriver, and torque‑controlled driver for screws.
- Templates: always use the manufacturer’s template to mark holes and mortice outlines; clamp the template to avoid movement while drilling.
- Pilot holes: drill pilot holes for fixings and the cylinder hole to avoid splitting and to keep the drill true.
- Morticing: route or chisel mortices in small passes; removing too much material results in a loose fit and weakens the door.
- Strike plate mortice: recess the strike plate so the bolt engages fully and stops flush against the face; use long screws that reach the studs of a timber frame, not just the surface.
Fixings, reinforcement and hardware selection
Choosing the correct fixings and reinforcement makes the installation durable and secure:
- Screws: use at least 70 to 75mm long screws for the strike plate and hinges so they reach the structural timber behind the frame.
- Strike reinforcement: for weak frames fit a steel strike plate or a boxed strike to distribute load; for domestic retrofits consider a reinforced strike kit.
- Cylinders: measure door thickness to select the correct cylinder length; the cylinder should not project more than 3mm from the outside face to reduce snapping risk.
- Anti-attack features: specify TS007 3-star rated cylinders on external doors; look for anti-snap, anti-bump, anti-drill properties.
- Multipoint doors: when adding a deadbolt to a multipoint door check compatibility with the existing mechanism and maintain the door’s weatherstripping and thresholds.
Installation and testing
Fit methodically and verify operation at each stage:
- Dry fit the case and cylinder before final fixing; operate the bolt with the door open to check smoothness and clearance.
- Fit the strike plate and close the door; mark final adjustments to the plate if the bolt hits the lip rather than seating correctly.
- Work the bolt: the key or thumbturn should operate without excessive force; lubricate with graphite or a light lock lubricant, not oil-based lubricants that attract dirt.
- Check for binding: if the bolt sticks when the door closes, realign the strike rather than forcing stronger screws; small adjustments to the strike location often cure the problem.
- Test under different conditions: paint, swelling timber in damp weather and thermal movement can change operation; test the lock after any finishing work.
Specific advice for uPVC and composite doors
uPVC and composite doors require particular attention to cylinders and reinforcement:
- Do not overtighten through-fix fixings; use the correct coach bolts and spacer sleeves where recommended by the manufacturer.
- Protect the cylinder: use a cylinder protector or reinforced escutcheon if the cylinder is externally accessible; ensure it meets insurance standards.
- For composite doors consult the door manufacturer before cutting into the panel; many composites have internal steel reinforcement and dedicated fixing points.
Final checks and common-sense maintenance
Once installed, perform a complete check and provide maintenance advice to the client or household:
- Ensure all screws are properly tightened but not over-torqued.
- Record the cylinder code and consider rekeying services if moving into a new property.
- Advise on regular lubrication twice a year and periodic inspection of fixings and frame condition.
Conclusion: A well-installed deadbolt improves security and longevity; avoid rushed measurements, inadequate fixings and incorrect cylinder selection. Next steps: review the door and frame, choose a correctly rated lock and cylinder, and follow the template and fixing recommendations. For more technical reference and product options visit our door locks hub at /guides/door-locks or contact Window Hardware Store for trade support and specification help.
Recommended Products
Based on this article, you may find these products helpful:


Related articles
uPVC Door Lock Maintenance: Keep Your Lock Working Smoothly
uPVC Door Lock Maintenance: Keep Your Lock Working Smoothly A well maintained upvc door lock reduces call-outs, keeps a property secure and extends the lif...
Hook Lock Sizes and Compatibility: Matching Your Existing Lock
Hook Lock Sizes and Compatibility: Matching Your Existing Lock Replacing a hook lock can be straightforward if you know what to measure and what to check f...
Replacing Individual Hook Locks vs Full Multipoint Mechanism
Replacing Individual Hook Locks vs Full Multipoint Mechanism Deciding whether to replace a single hook lock or the entire multipoint mechanism is a common ...