Heritage Sash Window Locks: Period-Appropriate Options
Heritage properties need window hardware that looks right for the period while meeting modern requirements for security and safety. Choosing the correct sa...
Heritage properties need window hardware that looks right for the period while meeting modern requirements for security and safety. Choosing the correct sash window lock is both an aesthetic and technical decision: the wrong lock will look out of place and may not function correctly on historic timber sashes or on later secondary-glazed and double-glazed replacements. This post covers period-appropriate options, installation tips for tradespeople, DIY advice for homeowners, and compliance points to consider.
Why choosing a period-appropriate sash window lock matters
Visual authenticity matters to conservation officers, house buyers and owners committed to preserving character. A suitably styled sash window lock preserves the building’s appearance; at the same time, the lock must provide a secure, weatherproof and durable fixing. Using modern hardware with the wrong proportions or finish can spoil cornices, mouldings and sightlines at the meeting rails.
Common heritage styles and finishes
When specifying hardware think about the architectural period and the finish most appropriate to that era. Typical options include:
- Georgian and early Regency: simple wrought iron or unlacquered brass fittings; slim, understated profiles.
- Victorian and late-Georgian: decorative handles such as monkey-tail or teardrop sash fasteners in polished or lacquered brass.
- Edwardian and Arts-and-Crafts: heavier, more robust ironwork or bronze with hand-forged appearance.
- Reproductions and sympathetic modern options: slimline brass or nickel finishes that replicate period profiles but use modern materials for durability.
Finishes to consider: unlacquered brass that will patinate, lacquered polished brass for low maintenance, antique bronze or blackened iron for an authentically aged look. Avoid bright chrome on pre-1900 properties unless the window is a modern replacement and chrome is appropriate.
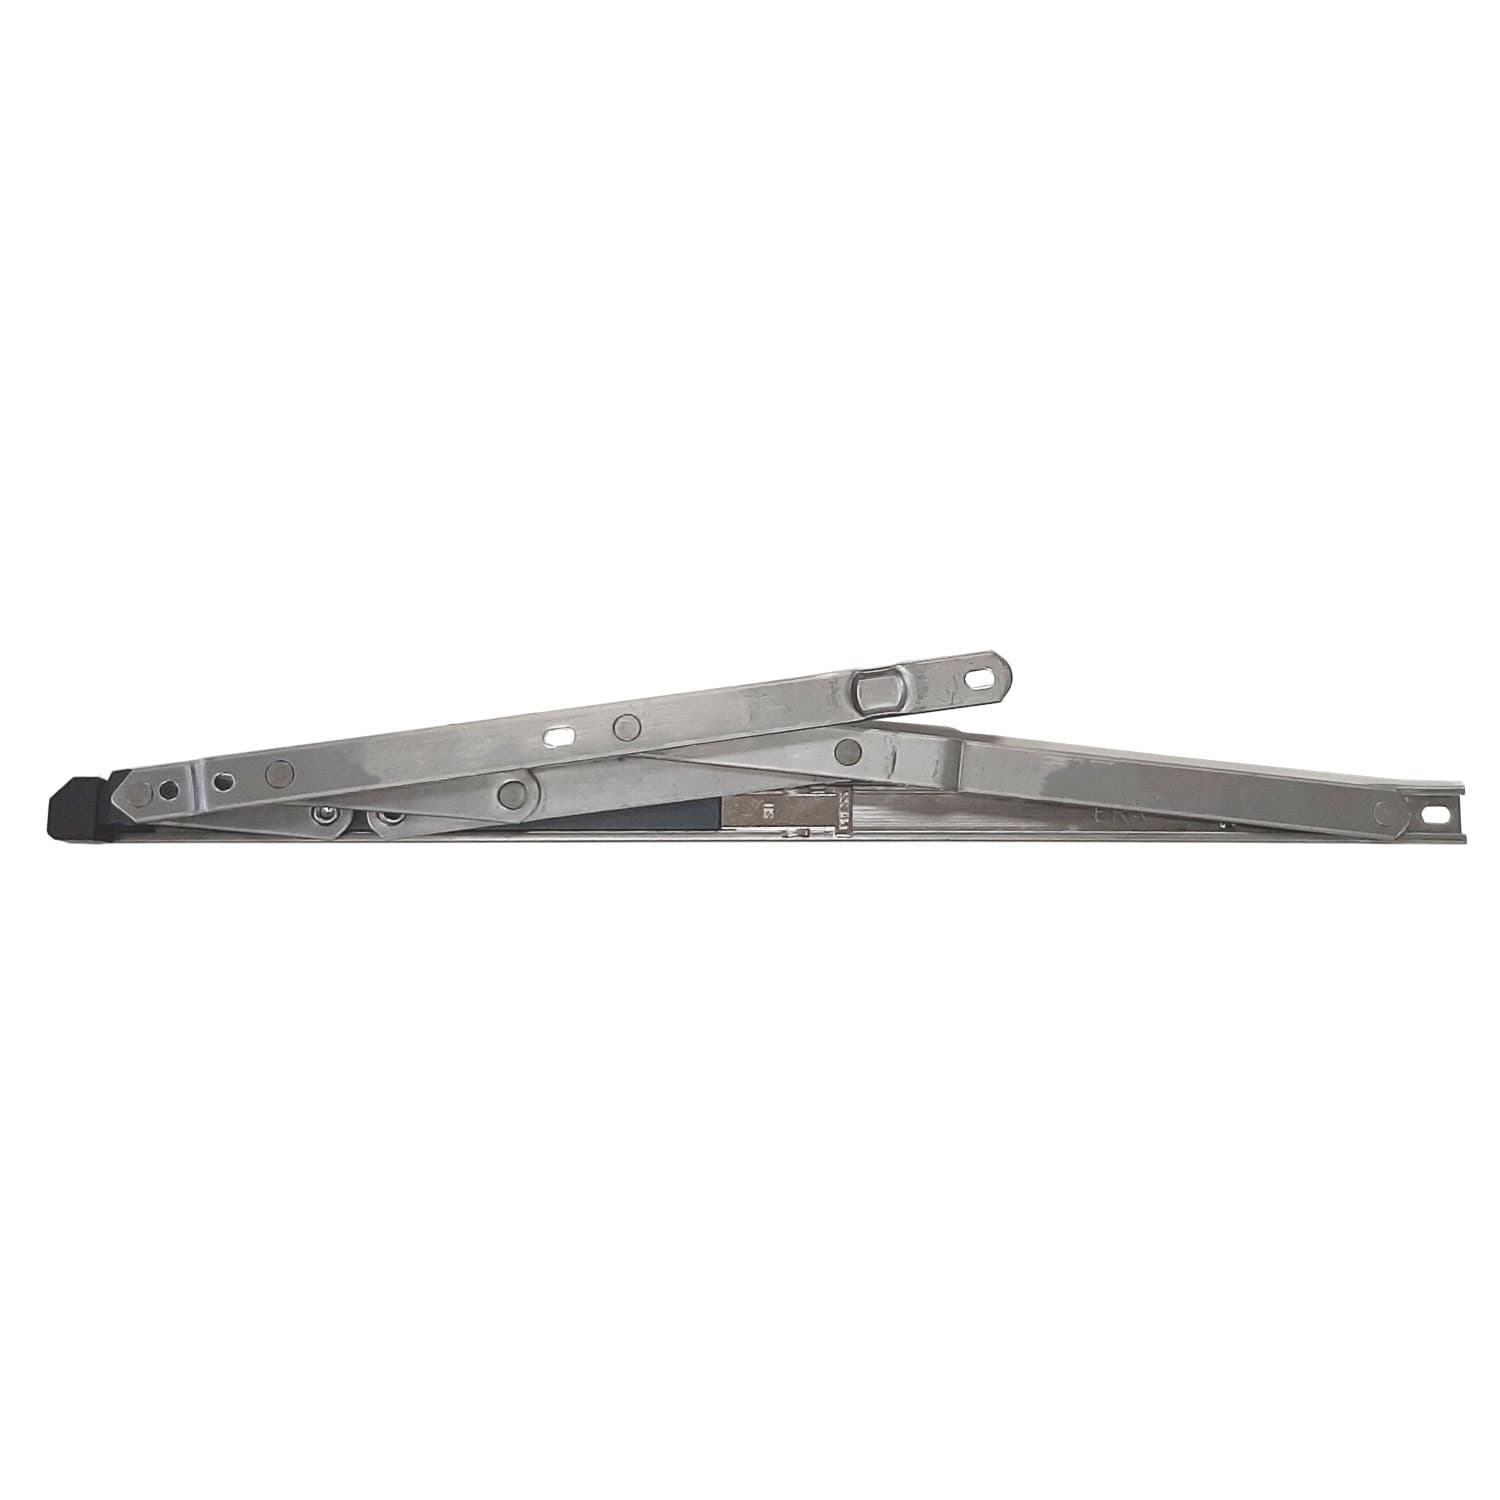
Types of sash window locks and restrictors
There are several mechanical approaches to locking sash windows; choose the type that suits sash construction and security needs.
- Traditional sash lock or sash fastener: surface-mounted on meeting rails; a cam action pulls sashes together and provides a tidy visual. Common in brass or iron.
- Mortice sash lock: recessed into the meeting rail to sit flush; better for tighter sightlines but requires routing into the timber.
- Keyed sash lock: provides additional security with a small cylinder; useful on ground-floor windows or properties at higher risk.
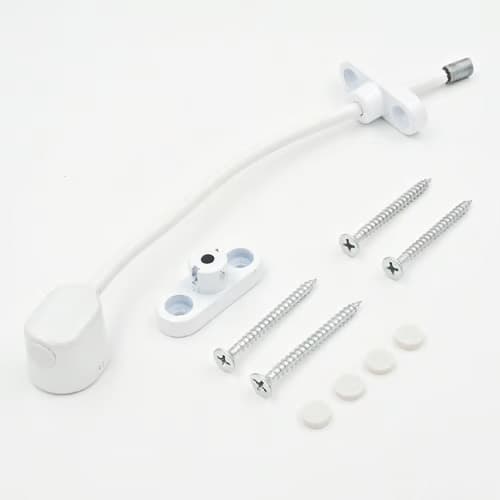
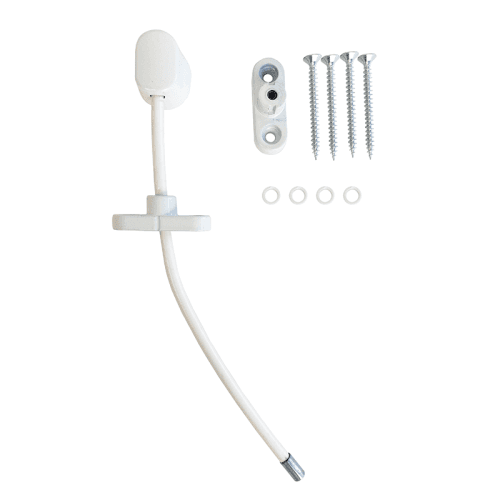
- Sash stop or sash restrictor: limits opening to a set distance for child safety and security; can be removable for cleaning.
- Anti-lift pins and keeps: fitted into meeting rail to prevent the lower sash being lifted out when unlocked; often used alongside locks for enhanced security.
Practical trade advice: specification and installation
Tradespeople should specify products that match sash thickness, meeting rail width and the presence of double glazing or secondary glazing. Key considerations and steps:
- Survey carefully: measure meeting rail thickness, face-to-face dimension and reveal depth. Note if the sash is original timber, new timber, or a double-glazed slimline unit; each requires different fixing lengths and keeps.
- Choose fixings to suit the environment: stainless steel screws for coastal locations; brass screws for visible, period-correct installations where galvanic reaction is not an issue.
- Morticing: if installing a mortice sash lock, check for hidden cords and weights and mark carefully. Use a chisel and router where appropriate; depth must allow the lock body to sit flush without thinning structural timber.
- Alignment and packing: sashes must close squarely for the cam to engage correctly. Use thin packers behind the keep if necessary to achieve alignment; adjust sash cords or spring balances first if the sash is out of true.
- Screw pilot holes: pilot and counterbore to avoid splitting, especially in hardwoods. Use appropriate diameter bits and countersinks for the selected screw heads.
- Sealing and finish: where paint will cover the lock, use touch-in paint after installation. For unlacquered finishes that will age, avoid paint on visible surfaces.
- Record fittings: for maintenance and for conservation records, note the make, model and finish on job sheets and handover documents.
DIY guidance: simple upgrades and maintenance
Homeowners can undertake straightforward upgrades and routine maintenance safely. Typical DIY tasks:
- Cleaning and lubrication: clean brass or iron with appropriate products; lubricate moving parts with a light machine oil or silicone spray to prevent sticking and minimise wear.
- Replacing a worn surface-mounted sash lock: remove screws, test-fit the new lock to the existing screw holes; if holes do not align, fill old holes with hardwood dowels or epoxy, then re-drill pilot holes.
- Fitting a sash stop or restrictor: these are often surface-fitted with two screws; position centrally or off-set as required for ventilation. Follow the manufacturer’s instructions for torque and fixing length.
- Checking cords and weights: if a sash is heavy or sticks, inspect cords and counterweights; do not add a heavy lock without addressing sash balance, otherwise locks can fail or timber can distort.
- When not to DIY: routing for mortice locks, addressing rot, and altering sash balance systems are best left to specialists if you lack carpentry experience.
Security and compliance considerations
Sash window locks provide a visible deterrent and should be part of a layered approach to home security. Points to check:
- Use two locks per sash where possible: one central and one at an upper corner or anti-lift pins to stop forced lifting.
- Consider keyed locks on ground-floor or vulnerable windows; keyed locks give added protection but ensure keys are manageable for householders and emergency egress is considered.
- Look for accredited hardware where applicable: products endorsed by Secured by Design or compliant with relevant British or European standards indicate higher security performance. PAS 24 is often referenced for whole-window security assessment.
- Remember ventilation and fire escape: any restrictor should allow sufficient opening for escape or be removable without tools in an emergency.
Recommended Products
Based on this article, you may find these products helpful:
- Structural Glazing Tape - 20mm
- Security Glazing Tape
- UAP Keyless Window Restrictor
- TSS Keyless Cable Window Restrictor
- Restricted Friction Stay Hinges
Conclusion and next steps
Choosing the right sash window lock balances period appearance, functionality and security. For conservation projects use hardware that matches the architectural character and specify fixings and installation methods that protect original fabric. Tradespeople should measure precisely and plan for packers or morticing as required; homeowners can carry out simple maintenance and replace surface-mounted locks, but call a specialist for morticing, rot repair and sash balance work.
For further technical advice and a wider selection of locks and restrictors, see our detailed resources and product range at /c/windows-restrictors or contact our trade desk for specification help and lead times.

Related articles
Window Restrictors
What Is a Cable Window Restrictor? How They Work
What Is a Cable Window Restrictor? How They Work A cable window restrictor is a simple mechanical device fitted to a window to limit how far it can open. I...
Cable Window Restrictor Safety Features Explained
Cable Window Restrictor Safety Features Explained What a cable window restrictor does and where it is used A cable window restrictor is a safety device fit...