How to Cut Wedge Gaskets for Corner Joints: Clean Finish Every Time
How to Cut Wedge Gaskets for Corner Joints: Clean Finish Every Time Why correct cutting matters Wedge gasket is a common seal used on aluminium and PVC win...
How to Cut Wedge Gaskets for Corner Joints: Clean Finish Every Time
Why correct cutting matters
Wedge gasket is a common seal used on aluminium and PVC windows and doors to keep draughts, water and noise out. A neat corner joint is as important as the gasket material itself: a poor cut or improper jointing will compromise weather performance and look untidy. Whether you are a trade fitter or a competent DIYer, the same principles apply: measure accurately, cut cleanly and assemble without stretching the material.
Tools and materials you will need
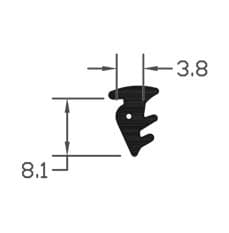
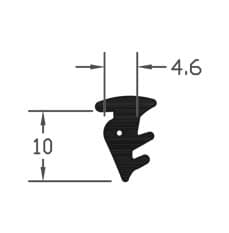
- Wedge gasket of the correct profile and material (EPDM, PVC or thermoplastic as specified).
- Sharp utility knife or specialised gasket knife; spare blades.
- Mitre box or wedge gasket mitre tool for consistent 45 degree cuts.
- Fine-toothed hacksaw or hot knife for thicker profiles; only use hot knife on compatible materials.
- Measuring tape, pencil or washable marker.
- Small pair of pliers and pick for seating the gasket into the groove.
- Gasket lubricant (soapy water or silicon-free insertion lubricant) and cloths.
- Compatible adhesive or sealant if required by the gasket manufacturer.
- Safety gloves and eye protection.
Types of wedge gasket and joint choices
Wedge gasket profiles vary: solid wedge, hollow wedge and double-lipped designs. The most common corner joints are mitred joints and butt joints. Tradespeople generally prefer mitred corners for external appearance and even compression across the seal. Butt joints are quicker but require a small bead of sealant to close any capillary path; they are acceptable in less exposed locations.
Preparation and measuring
Work on a clean, flat surface. Measure each side of the frame and mark the gasket run. Allow a small allowance for seating: add 5 to 10 mm per corner so you are not short when forming the joint. Do not over-stretch the gasket when fitting: the seal should sit naturally in the groove with slight compression when the window or door closes.
Marking and mitring technique
- Decide whether you are producing internal or external mitres. External mitres meet on the outward face; internal mitres meet on the inward face. Mark the outside face of the gasket so you maintain correct orientation.
- Use a mitre box or a gasket mitre tool set to 45 degrees. Place the gasket so the blade will cut towards the waste side; this ensures the finished faces meet neatly on the visible edge.
- For hand tools: hold the gasket firmly in the mitre box and use smooth steady strokes with a very sharp knife; replace blades frequently to avoid tearing.
- For thicker or stiffer gaskets, a hot knife produces cleaner edges; warm the blade, cut slowly and allow the end to cool without stretching.
Cutting for internal corners
Internal corners are those on the inside face of the building. For the neatest result follow these steps:
- Cut each gasket end at 45 degrees so that the short face meets the long face of the adjoining piece; this reduces the chance of a visible gap on the inside face.
- Check that the internal faces are flush when dry-fitted. Make small adjustments with the knife; remove any burrs or fibres that could prevent a tight fit.
- Apply a thin smear of compatible adhesive into the groove only if the profile requires bonding; many wedge gaskets are retained mechanically in the glazing channel and do not need adhesive.
Cutting for external corners
For external corners the visual appearance is more critical and the weather performance is paramount:
- Mitre the gasket so the visible outer edges form a continuous straight line. The 45 degree faces should meet without any overlap on the outer edge.
- If the profile is hollow or has a fin, take care to match the geometry of both pieces so the compression is uniform; otherwise water can track into the joint.
- Where recommended, use a small bead of neutral-cure silicone in the joint; avoid solvent-based adhesives that can damage some gasket materials.
Fitting the gasket
Do not stretch the gasket when inserting. Use a lubricant to help the profile slide into the channel if the fit is tight; water with washing-up liquid works well and is easy to wipe away. Seat the gasket fully into the groove using a flat plastic or wooden tool; metal tools can cut the gasket or score the frame. Finish by checking that the gasket returns to its natural shape at the corners and that there is even compression along the frame when the window or door is closed.
Common mistakes and how to avoid them
- Using a blunt blade: this causes ragged cuts and internal tearing. Replace blades often.
- Stretching the gasket to make up length: stretched ends will retract and create gaps at corners. Cut to length with the correct allowance instead.
- Incorrect orientation: many wedge profiles are asymmetric; if fitted the wrong way round the seal will look wrong and leak.
- Overuse of adhesive: excess adhesive can prevent the gasket seating properly and can be difficult to remove. Follow manufacturer instructions.
- Not testing: always close the window or door and check for even compression and visible gaps before final sign-off.
Maintenance and replacement tips
Inspect gasket corners annually for signs of UV degradation, hardening or splits. Small imperfections can be remedied with a short length of new gasket or a small bead of neutral silicone for exterior corners. For full replacement, remove the old gasket carefully; clean the groove with a soft brush and a mild detergent; allow to dry before fitting new gasket. Store spare lengths flat and out of direct sunlight to prevent distortion.
Recommended Products
Based on this article, you may find these products helpful:
- SYS2 Wedge Gasket
- SYS4 Wedge Gasket
- E-Type Gasket - Black 5m Roll
- E-Type Gasket - Black (Per Metre)
- Structural Glazing Tape - 20mm
Conclusion and next steps
Clean, waterproof corner joints on wedge gasket require accurate measurement, sharp tools and correct joint choice. For a professional finish use a mitre tool, avoid stretching, and always maintain the correct gasket orientation. If you are fitting a new gasket and want the best result, consider investing in a gasket cutter and high-quality blades; for larger or repeated jobs choose a hot-knife cutter specified for your gasket material. For more detailed product recommendations and technical data, visit our gaskets and seals pillar page at /guides/gaskets-seals or contact our trade advisors for advice on compatible adhesives and profiles.
Products mentioned in this article
Related articles
Wedge Gasket Sizes Explained: Finding the Perfect Fit for Your Glazing
Wedge Gasket Sizes Explained: Finding the Perfect Fit for Your Glazing Why the correct wedge gasket matters A wedge gasket is a triangular or tapered seali...
Wedge Gasket vs Flip Gasket: Choosing the Right Seal for Double Glazing
Wedge Gasket vs Flip Gasket: Choosing the Right Seal for Double Glazing Why the right gasket matters Seals are a small component with a big job: they keep ...
Wedge Gasket Installation Guide: Achieving a Watertight Seal Every Time
Wedge Gasket Installation Guide: Achieving a Watertight Seal Every Time A correctly fitted wedge gasket is one of the simplest and most effective ways to p...