How to Replace a Night Latch Lock: DIY Instructions
How to Replace a Night Latch Lock: DIY Instructions A night latch is a common surface-mounted lock found on many UK front doors; it offers easy exit from t...
How to Replace a Night Latch Lock: DIY Instructions
A night latch is a common surface-mounted lock found on many UK front doors; it offers easy exit from the inside with a turn knob and key access from outside. Replacing a worn or damaged night latch is a realistic DIY job for a competent homeowner or trade professional. This post covers practical steps, trade tips and common pitfalls so you can fit a new night latch correctly and maintain door security and insurance compliance.
When to replace your night latch
Replace the night latch if:
- the latch fails to deadlock or release reliably;
- the cylinder is damaged or shows excessive play;
- the case is corroded, warped or split;
- you are upgrading to a deadlocking night latch for increased security and insurance requirements.
Remember: some insurers insist on a BS3621 deadlocking night latch or equivalent; check your policy before fitting a non-compliant unit.
Tools and parts you will need
- Replacement night latch (check handedness and backset);
- Pozidriv screwdrivers and/or cross-head set;
- Tape measure and marker;
- Power drill with wood or metal bits as appropriate;
- Chisel and mallet (for minor frame or door adjustments);
- Masking tape and rag; penetrating oil for seized screws;
- Spare woodscrews or security screws; stainless steel recommended for coastal locations;
- Silicone sealant (if fitting to a composite or uPVC door to keep water out).
Check compatibility before you start
Night latches come in rim-mounted formats with a rim cylinder on the outside and a turn knob inside. Measure door thickness and the backset (distance from door edge to centre of the latch cylinder or spindle). Choose a latch sized to the door and confirm whether you need a handed unit: many modern night latches are reversible, but some older models are handed for left- or right-opening doors. If the lock must meet insurance standards, select a BS3621-certified deadlocking night latch.
Removing the old night latch
- Open the door and support the inside trim or knob to prevent it dropping when screws are removed.
- Unscrew the two or more screws fixing the case to the face of the door; place screws aside in a small container.
- Pull the case away from the door; the rim cylinder should slide free from its outer escutcheon. If the cylinder is stuck, apply penetrating oil and gently work it free.
- Remove the strike plate from the frame if you plan to replace or reposition it; keep all fixings for re-use if suitable.
- If the latch has a separate internal fastening for the spindle or cam, note its position and remove it; take photographs if helpful for reference.
Fitting the new night latch
Follow the manufacturer’s template if supplied. Aligning the case and cylinder is the most critical part of fitting a night latch.
- Place the new latch case on the door face and mark screw positions with a pencil. Check that the latch bolt lines up roughly with the strike plate opening in the frame.
- If necessary, chisel a shallow mortice so the case sits flush; take small amounts away and test-fit frequently. For uPVC or composite doors, use the manufacturer’s recommended fixing method rather than aggressive chiselling.
- Drill pilot holes for the screws to avoid splitting timber. Use stainless steel screws in coastal environments and longer screws into solid timber to get a secure fixing.
- Insert the rim cylinder into the outer escutcheon; engage the cam correctly so the cylinder turns the latch. Fit the inside trim and tighten screws evenly; do not overtighten and distort the case.
- Re-fit or adjust the strike plate on the frame. The deadlocking lug of a deadlocking night latch must engage fully into the strike; enlarge the frame recess if it prevents full engagement.
Testing and adjusting
Before finishing, test the following:
- With the door open: turn the internal knob to check the latch withdraws smoothly.
- With the door closed: turn the external key to lock and unlock; ensure the deadlocking feature engages if fitted; the key should operate smoothly without excessive force.
- Check the door closes fully without binding; if the latch scrapes the strike, adjust the strike plate up or down by minor chiselling and re-fixing.
- Confirm that the cylinder does not project excessively beyond the outer escutcheon; exposed cylinder is an attack risk. If it projects by more than a few millimetres, replace with the correct cylinder length.
If the lock is stiff, remove and check the spindle, cam and lubrication points; a little graphite or specialist lock lubricant can improve action. Do not use oil-based lubricants that attract dirt.
Trade tips and common issues
- If screws are seized into an old timber door, apply penetrating oil and use progressively larger screwdrivers or impact bits to avoid camming out heads; replace stripped screws with fresh fasteners.
- For uPVC doors, confirm the fixing plates and spindle fit the door’s reinforcing; many uPVC doors need specific kits for secure fitting.
- Carry common cylinder lengths, spare screws and strike plates: this reduces return visits on a job for trade professionals.
- If the door is multi-point locked as well as having a night latch, ensure the two systems do not interfere when engaged; check alignment across the whole closing sequence.
- For higher security, fit an anti-snap cylinder or a deadlocking night latch and consider additional hardware such as a door chain or viewer.
Safety and insurance considerations
Replacing a night latch can be a DIY task; however, for compromised cylinders, recommended security upgrades or where insurance requires certification, use an experienced locksmith. Document the new lock make and model; some insurers request proof of compliant equipment. If you are unsure about compliance with BS standards, consult a recognised trade supplier or locksmith.
Recommended Products
Based on this article, you may find these products helpful:
- Multipoint Gearbox GU Old Style
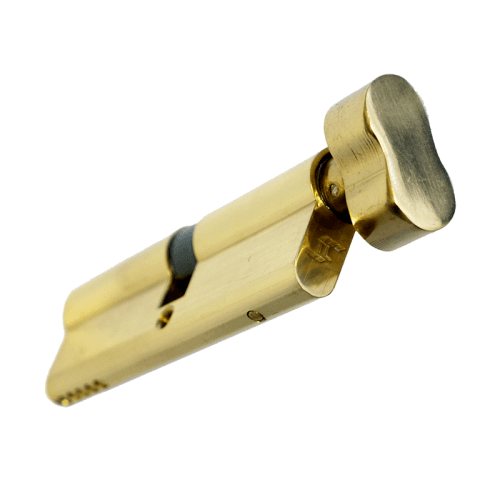
- TL Thumb Turn Euro Cylinder
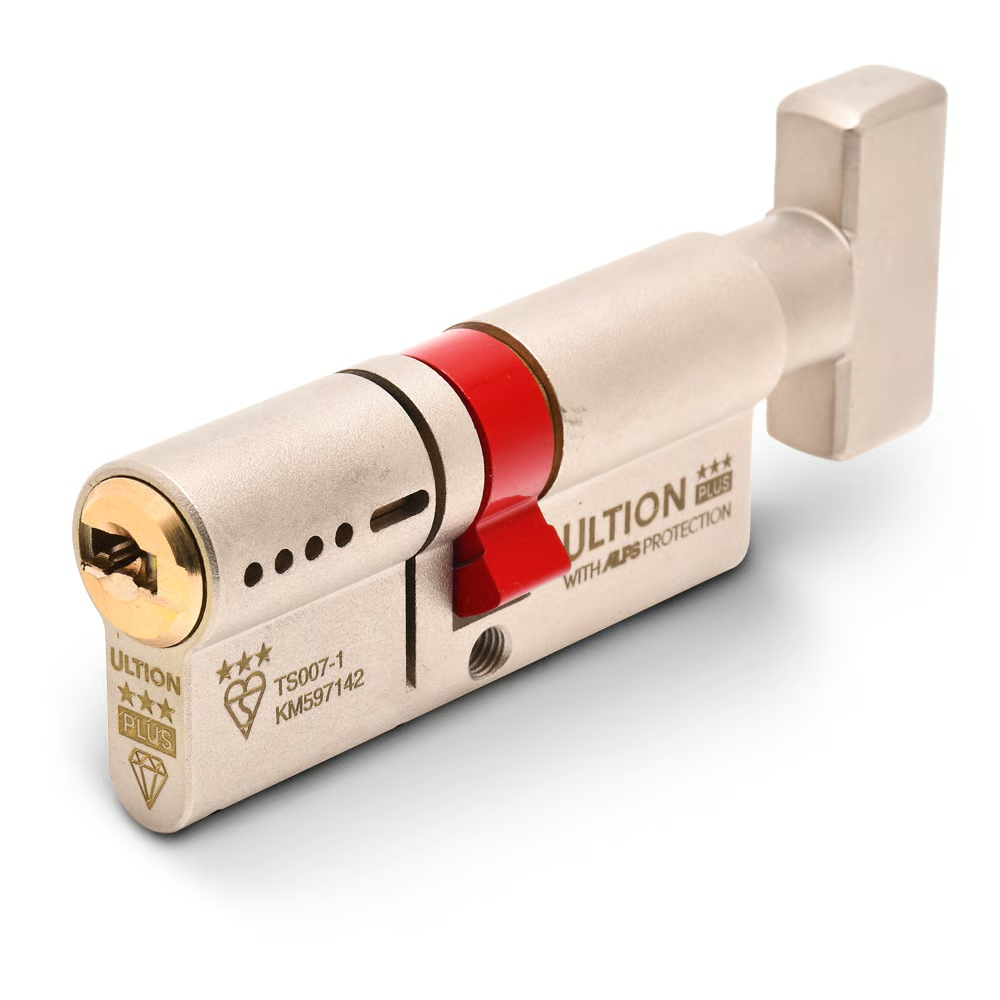
- Ultion Plus TS007 3* Kitemarked Euro Key & Turn Cylinder
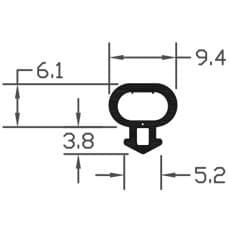
- B003 Bubble Gasket
- B004 Bubble Gasket
Conclusion and next steps
Replacing a night latch is straightforward when you select the correct size, follow template alignment and test operation thoroughly. After fitting, check insurance requirements and consider security improvements such as anti-snap cylinders or deadlocking variants. For more detailed information on door locks and compatible hardware, visit our pillar resource: door locks guide. If you prefer a professional installation or need certification, contact a registered locksmith.


Related articles
How to Fit a Night Latch: Step-by-Step Installation Guide
How to Fit a Night Latch: Step-by-Step Installation Guide A night latch is a common surface-mounted lock fitted to the inside face of a front door; it lock...
Automatic vs Manual Night Latches: Which Type Do You Need?
Automatic vs Manual Night Latches: Which Type Do You Need? Choosing the right night latch for a front or back door is a common decision for UK homeowners a...
Night Latch vs Deadlock: Which Is Better for Your Door?
Night Latch vs Deadlock: Which Is Better for Your Door? Choosing the right lock affects both security and daily convenience; this article compares night la...