How to Replace Hook Locks on a Multipoint Door Lock
How to Replace Hook Locks on a Multipoint Door Lock Hook locks are a common choice on UPVC, composite and aluminium doors because they pull the door into t...
How to Replace Hook Locks on a Multipoint Door Lock
Hook locks are a common choice on UPVC, composite and aluminium doors because they pull the door into the frame and provide good security and draught-sealing. Over time hooks can wear, break or suffer from misalignment; replacing them is a straightforward job for an experienced DIYer or trade professional when you follow the correct sequence and use the right parts. This article covers practical, technically accurate steps for replacing hook locks on multipoint mechanisms, plus trade tips for a reliable finish.
When to replace the hook
Replace the hook if you notice any of the following: the hook does not engage cleanly with the keep, the door sticks or binds, visible corrosion or damage to the hook arm, or the mechanism has slack that causes play in the handle. Also replace hooks when replacing the whole multipoint gear because worn hooks accelerate wear on keeps and keepers.
Tools, consumables and parts you will need
- Screwdrivers: cross-head and flat, and Torx set where applicable
- Hex/Allen keys and a multi-bit driver
- Replacement hook module or complete lock case, correct handedness and measurements
- Replacement spindle and fixing screws if worn
- Masking tape and permanent marker to mark positions
- Soft-faced hammer and chisel for minor frame work
- Lubricant: silicone spray or dry-film graphite; do not use heavy oils
- Caliper or tape measure to record centre, backset and case depth
- Personal protective equipment: gloves and safety glasses
Pre-checks and measurements
Before starting, record the following dimensions: centre to centre (handle to cylinder), backset, case depth and the overall case length. Note the handing: stand outside the property with the door opening away from you; if the hinges are on the left it is left-handed, otherwise right-handed. Buy a replacement hook module or multipoint case that matches these dimensions. Hooks come in various profiles: stepped, flat, or swept; match the profile and throw to the original for correct engagement with the keeps.
Step-by-step replacement: removing the old hook
- Close the door and support it; for heavy doors a second person is recommended to prevent sagging during work.
- Remove the handles: unscrew the handle screws and withdraw the handles. If the handle is stuck, apply WD-40 sparingly and tap the spindle gently with a soft hammer.
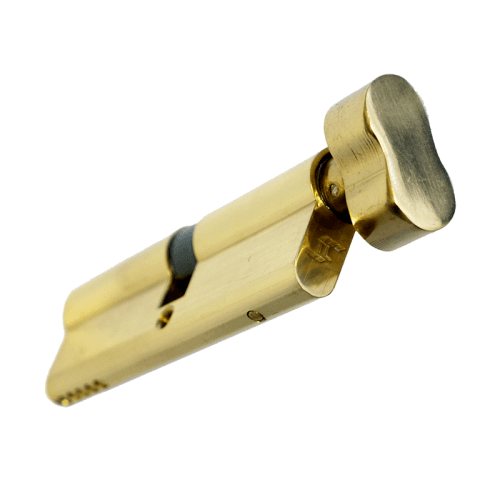
- Remove the cylinder: open the door and turn the key a fraction to align the cam; this will allow the euro cylinder to slide out when you release the retaining screw. Keep the cylinder safe; if you are replacing the cylinder as well, note whether it is a standard euro, half-cylinder or Scandinavian profile.
- Unscrew the faceplate screws: remove the screws along the edge of the door that secure the multipoint case. Keep the screws in order as some doors use different length screws.
- Withdraw the multipoint case: carefully slide the lock case out of the edge of the door. If it hangs on any internal retaining clips, ease it free; a small flat screwdriver will help to release clips without damaging the timber or PVC.
- Inspect the hook: depending on the make, the hook may be part of a replaceable module or riveted into the gearbox. If modular, release the securing screws or clips and remove the hook assembly. If the hook is integral, you will usually replace the entire case.
Fitting the new hook or module
- Compare old and new parts: line up profiles and measure the throw. If the new part does not match the shape of the old hook, do not force it; a mismatch will cause premature failure or poor sealing.
- Fit the replacement module into the case or replace the whole case as required. Ensure the orientation is correct for the door handing: the hook points and operating geometry must match the original.
- Reassemble the case into the door edge: slide the case back into position and secure the faceplate screws. Tighten progressively to avoid twisting the case; do not overtighten and strip the screw holes.
- Refit the cylinder and handles: insert the cylinder, secure the retaining screw and refit handles. Check the spindle sits centrally and that the handle returns correctly when released.
Adjustment, lubrication and testing
After fitting: lubricate the moving surfaces with a light silicone spray or dry graphite; avoid oil-based lubricants that attract dust. Operate the handle several times to check the hook engages and withdraws smoothly. Close the door to test engagement into the keep. If the hook catches on the keep, adjust the keep position by slackening the keeper screws and moving it slightly until smooth engagement is achieved. For trade professionals, measuring engagement depth and lateral offset with a feeler gauge speeds repeatability on production installations.
Common issues and troubleshooting
- Hook not engaging: check hook profile and throw; most problems are mismatch or a misaligned keep.
- Handle stiffness: check for binding in the gearbox; ensure the spindle is straight and the fixings are not over-tightened.
- Excessive play in the handle: check for worn followers and replace the gearbox or followers; cheap repairs often mask more extensive internal wear.
- Door sags after work: ensure hinges are tight and not contributing to misalignment; if necessary readjust hinges before continuing fine adjustment of the keeps.
Trade tips and safety
- Always keep an identical spare module to hand when replacing on site; this minimises call-backs and repeat visits.
- Record measurements and photograph the original setup before disassembly; this saves time when ordering parts.
- When ordering replacements for older doors, consider replacing the entire multipoint case if hook modules are obsolete; this avoids repeated failures.
- Never force a non-matching hook to engage; it damages the keep and case and creates security risks.
Recommended Products
Based on this article, you may find these products helpful:
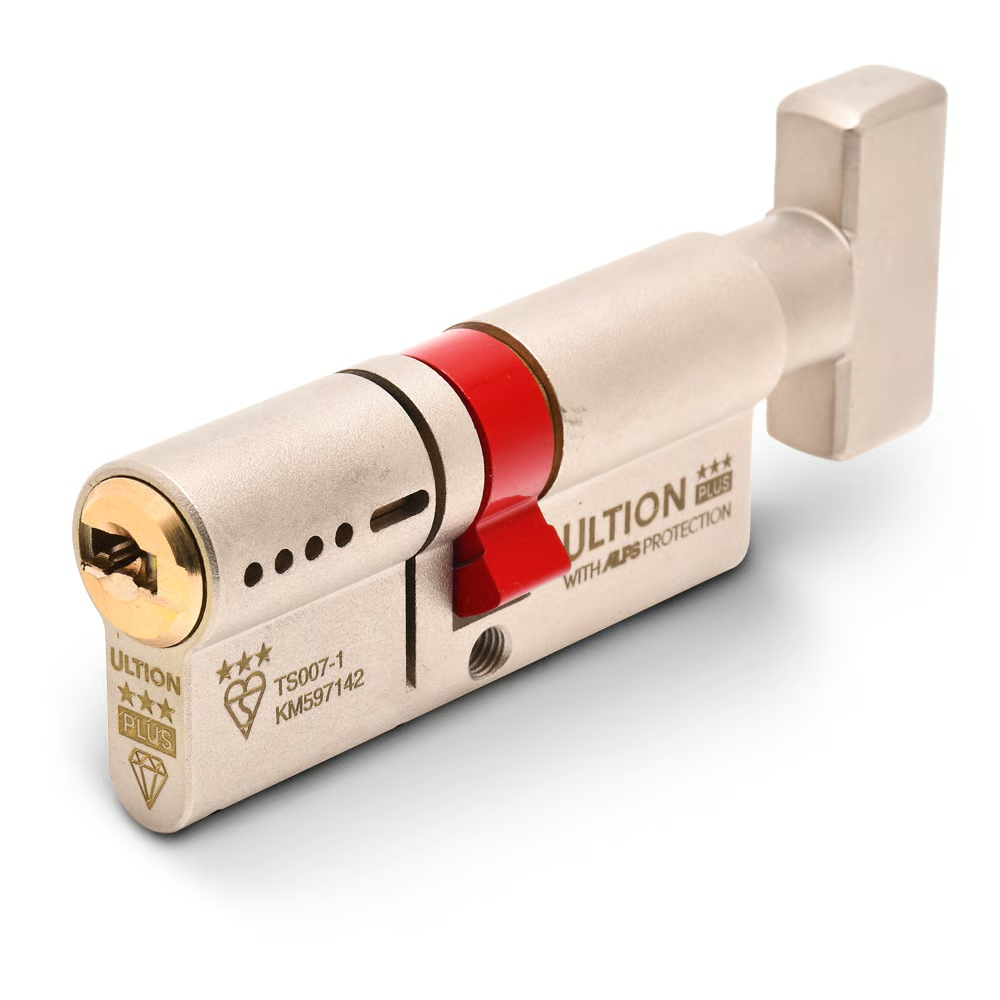
- TL Thumb Turn Euro Cylinder
- Ultion Plus TS007 3* Kitemarked Euro Key & Turn Cylinder
- Multipoint Gearbox GU Old Style
- In-Line Window Mechanism
- Offset Window Mechanism
Conclusion and next steps
Replacing a hook lock on a multipoint door is a manageable task when you match parts correctly, take precise measurements and adjust keeps for smooth engagement. If you are a trade operative, carry common modules and measuring tools to speed up the job. For homeowners undertaking the work as DIY: if you encounter a non-modular case, significant corrosion or the door geometry has shifted, contact a specialist to avoid compromising security.
Next steps: measure your existing lock and order the correct hook module or new multipoint case; if unsure, take photos and consult a trusted supplier. If you prefer professional assistance, provide the door handing and measurements to the installer to ensure a quick, accurate replacement.


Related articles
uPVC Door Lock Maintenance: Keep Your Lock Working Smoothly
uPVC Door Lock Maintenance: Keep Your Lock Working Smoothly A well maintained upvc door lock reduces call-outs, keeps a property secure and extends the lif...
Hook Lock Sizes and Compatibility: Matching Your Existing Lock
Hook Lock Sizes and Compatibility: Matching Your Existing Lock Replacing a hook lock can be straightforward if you know what to measure and what to check f...
Replacing Individual Hook Locks vs Full Multipoint Mechanism
Replacing Individual Hook Locks vs Full Multipoint Mechanism Deciding whether to replace a single hook lock or the entire multipoint mechanism is a common ...