Child-Safe Cable Window Restrictors: What to Look For
Child-Safe Cable Window Restrictors: What to Look For is a practical overview for homeowners and trade professionals who need to specify, buy and fit a cab...
Child-Safe Cable Window Restrictors: What to Look For is a practical overview for homeowners and trade professionals who need to specify, buy and fit a cable window restrictor that keeps children safe while maintaining emergency egress and aesthetic appeal. Cable restrictors are a popular, unobtrusive solution for casement, top-hung and tilt-and-turn windows; this post covers what to check when selecting and installing them.
Why choose a cable window restrictor
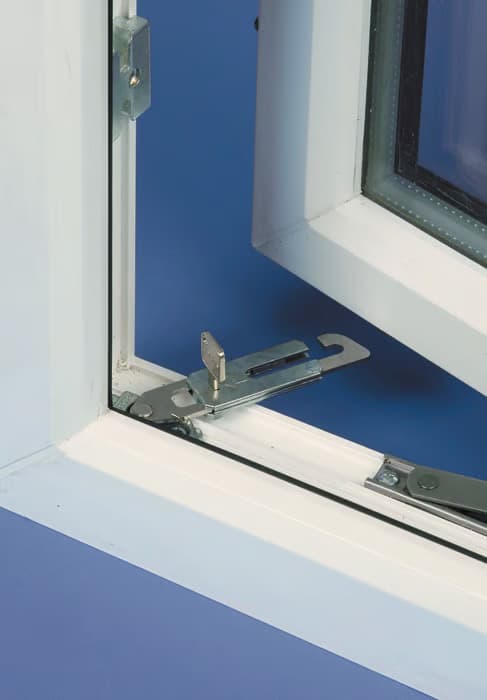
Cable window restrictors limit how far a window can open: they prevent falls while allowing ventilation. Compared with solid bar or hinge restrictors, cable types are slim, flexible and less conspicuous; they work well on outward and inward opening windows and suit a range of materials including timber, aluminium and uPVC. For properties where child safety is the priority, a properly specified restrictor reduces risk without compromising everyday use.
Key technical features to check
- Cable material and diameter: Look for stainless steel cable to resist corrosion. Typical diameters are 1.5mm to 2mm; thicker cable offers more abrasion resistance but may be less tidy visually.
- Breaking load and working load: Manufacturers publish tensile strength and working loads; choose a restrictor with a substantial safety margin over expected loads. Where available, check that products meet relevant standards such as the EN 13126 series for window hardware or manufacturer test data.
- Release mechanism: Options include push-button, keyed release and quick-release fittings. For child safety, a mechanism that is tamper-resistant but allows an adult to release quickly in an emergency is essential; consider keyed or recessed push-button designs depending on location and occupants.
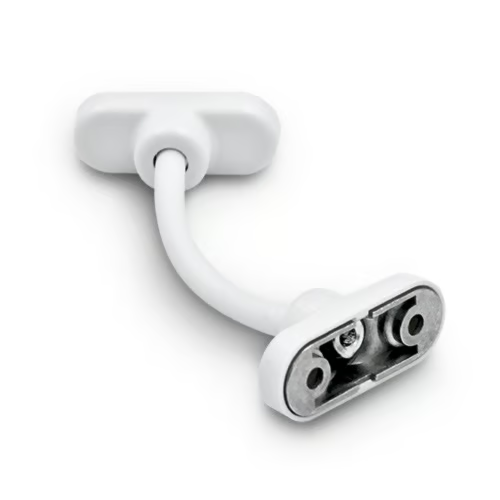
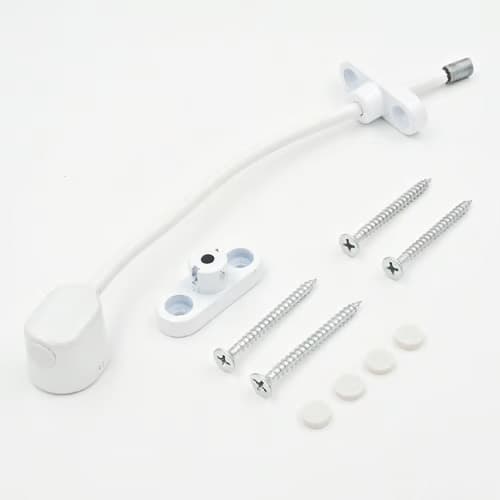
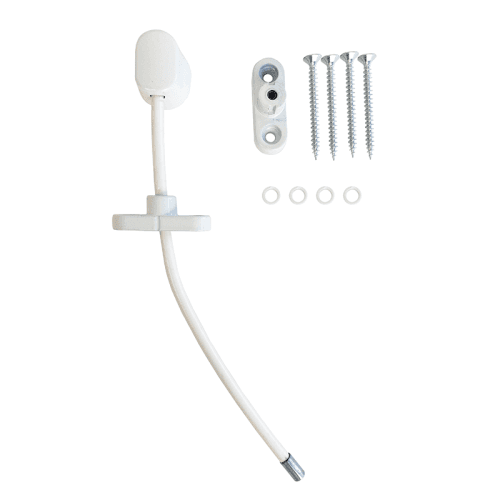
- Fixing plates and screw types: Heavy duty steel or stainless steel fixing plates provide secure anchorage. Verify that screw sizes supplied are appropriate for the substrate; some kits include self-tapping screws for uPVC and wood, while masonry fixings should be provided separately.
- Maximum opening and cable length: Restrictors are typically sold with a set cable length or adjustable stops; confirm the resulting maximum opening suits your safety requirement, commonly limiting sash travel to around 100mm for child protection.
- Corrosion resistance and finish: Choose a finish to suit the window finish: satin stainless, polished chrome, brass or powder-coated black are common. For coastal locations specify marine-grade stainless or protective coatings.
- Concealed fixings and aesthetic options: Some restrictors have covers or countersunk screws for a neater appearance; consider these for visible living room or bedroom windows.
Installation and DIY tips
For competent DIYers the basic fitment is straightforward, but correct positioning and fixing is critical to performance and safety. Always follow the manufacturer instructions and consider the following practical points:
- Mount the sash-side plate to the moving part of the window and the frame-side plate to the fixed frame; mark positions with the window in the required open limit, typically around 80–120mm depending on the chosen safe opening.
- Use pilot holes for timber and metal windows to avoid splitting or distorting the frame. For wood a 2.5–3mm pilot is typical for No.8 screws; for aluminium or steel use pop rivets or threaded inserts as appropriate.
- When fixing to uPVC avoid screwing into glazing beads or thin PVC sections. Aim for the reinforced profile chamber and use manufacturer-approved screws; if uncertain, a through-bolt with backing plate provides a more secure solution.
- For masonry surrounding a window where the frame cannot take the load use appropriate wall anchors; choose plug and screw types rated for the substrate and the applied load.
- Check that the restrictor does not obstruct the window handle or prevent the sash from fully closing. Operate the window fully closed and to the restricted open position several times to check smooth operation.
- If installing multiple windows maintain consistent mounting heights so restrictors look uniform and provide the same restricted opening across a property.
Trade-level considerations
Installers and specifiers should think beyond the product box: record-keeping, batch testing and client briefing matter. Provide customers with written instructions on how to use the release mechanism and arrange periodic inspection. For social housing and childcare settings select tamper-proof options with documented test certificates; supply a maintenance schedule and retain batch numbers for warranty and safety audits.
Maintenance and testing
Regular checks are essential: inspect cables for fraying, corrosion or kinks; ensure fixings are tight and release mechanisms operate smoothly. A simple maintenance routine for homeowners is to inspect every six months and lubricate moving parts with a light machine oil approved for the finish. Trade professionals should carry out annual checks on installations and replace any restrictor showing wear or that fails functional testing.
Choosing the right model for your property
- For family homes with young children: choose a restrictor with a secure, tamper-resistant release and set the opening to a narrow gap that still allows ventilation.
- For upper-floor rooms where emergency escape is a consideration: select a quick-release mechanism that an adult can operate from inside without keys that may be misplaced.
- For uPVC and aluminium windows: opt for fixings designed for profiles and consider through-bolting where possible for maximum security.
- For heritage or high-end properties: select low-visibility restrictors or finishes that match existing hardware while maintaining required performance.
Recommended Products
Based on this article, you may find these products helpful:
- UAP Keyless Window Restrictor
- TSS Keyless Cable Window Restrictor
- TSS Fixed Cable Window Restrictor
- RES Lock Concealed Window Restricto
- TSS Cockspur Window Handles
Conclusion and next steps
A correctly specified and fitted cable window restrictor provides effective child safety while preserving ventilation and appearance. Next steps: identify the windows you want to protect; measure the sash and frame; choose a restrictor with appropriate cable strength, release type and fixings for your window material; fit following the guidance above or instruct a competent installer. For wider information on window locks and restrictors visit our pillar guide on window locks and restrictors or contact Window Hardware Store for trade pricing and technical support.

Related articles
Window Restrictors
What Is a Cable Window Restrictor? How They Work
What Is a Cable Window Restrictor? How They Work A cable window restrictor is a simple mechanical device fitted to a window to limit how far it can open. I...
Cable Window Restrictor Safety Features Explained
Cable Window Restrictor Safety Features Explained What a cable window restrictor does and where it is used A cable window restrictor is a safety device fit...