How to Fit a Window Restrictor: Step-by-Step Instructions
How to Fit a Window Restrictor: Step-by-Step Instructions A window restrictor is a simple, effective device that limits how far a window opens; it improves...
How to Fit a Window Restrictor: Step-by-Step Instructions
A window restrictor is a simple, effective device that limits how far a window opens; it improves child safety and reduces the risk of falls while still allowing ventilation. Whether you are a trade professional fitting a batch of windows or a homeowner carrying out a one-off installation, this post gives practical, technically accurate steps and tips for a reliable fit. For more background on types and compliance, see our pillar page: Window Locks & Restrictors.
Types of window restrictor and where to use them
Choose the correct restrictor for the application before you start: select a lockable or keyed restrictor where security is important; choose a quick-release or tool-free release type where the window forms an emergency escape route. Common types include:
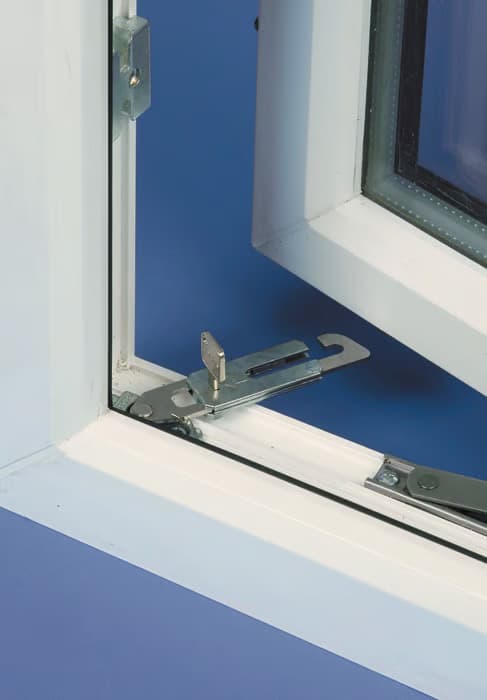
- Restrictor arm: metal arm that limits sash travel; common on casement and top-hung windows.
- Keyed sash restrictor: locks open position until unlocked with a key; used where security or permanent restriction is required.
- Quick-release restrictor: allows rapid release from the room side without tools; suitable for escape windows.
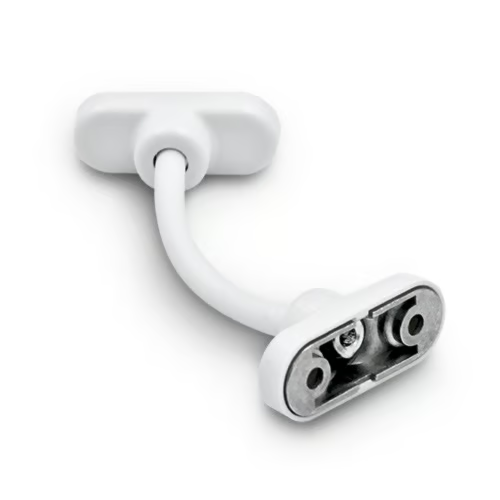
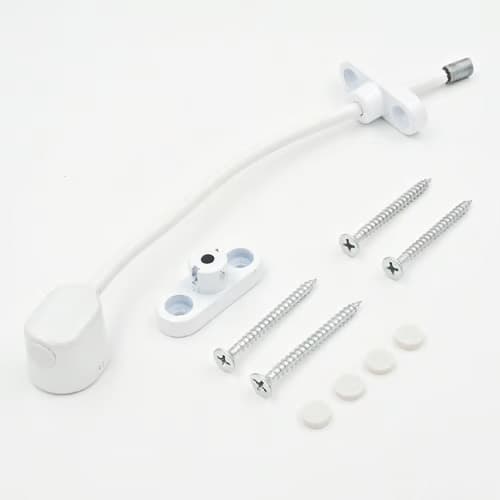
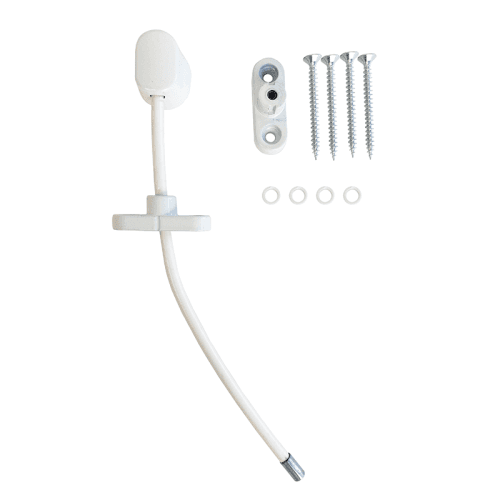
- Chain or cable restrictor: flexible solution often used on sliding or irregular sashes.
- Sash stop or limiter for vertical sliding sash windows: simple block to limit travel.
Tools and materials
Prepare the correct tools and fixings before you begin. Using the proper fasteners and drill bits is essential for a durable fit.
- Drill (corded or cordless) and suitable drill bits: wood bits for timber frames, HSS or self-tapping bits for aluminium, masonry bits if you need to fix to brick or stone.
- Centre punch or marker, tape measure, pencil and spirit level.
- Screwdrivers or a PZ2 screwdriver bit; rivet tool for pop rivets.
- Stainless steel screws (A2 for general use, A4 for coastal locations): typically 3.5–4.8 mm diameter; length 28–40 mm depending on frame depth and material.
- Rawl plugs for brick/stone and suitable screws if fixing to substrate rather than frame.
- Protective eyewear and gloves.
Pre-install checks and positioning
Before drilling, carry out these checks and markings; poor positioning is the most common cause of restrictor failure.
- Decide which side of the window the restrictor will mount on: fitting to the hinge side is common for casement windows as it keeps the arm out of the way when closing.
- Measure the desired maximum opening: test the sash by propping it to the required opening and mark where the fixing plates will sit when the restrictor is fully extended.
- Ensure the chosen restrictor does not obstruct handles, espagnolette mechanisms or window furniture; leave adequate clearance to close and lock the window fully.
- If the window is a primary escape route, select a quick-release model and fit it where it can be released easily from the room side.
Step-by-step fitting
Follow these steps for a standard restrictor arm installation on a casement window. Adapt screw types and lengths for timber, UPVC or aluminium frames.
- Step 1: Trial-fit the restrictor by holding the backplate on the fixed frame and the arm plate on the sash; ensure the arm reaches the desired open position and the plates are not obstructed.
- Step 2: Mark centre points for pilot holes on both the fixed frame plate and the sash plate; use a pencil and a spirit level to keep alignment accurate.
- Step 3: Drill pilot holes: for timber use a wood bit slightly smaller than the screw shank; for UPVC use a pilot around 2–3 mm depending on screw; for aluminium use a suitable metal drill and consider using self-tapping screws or blind rivets for the neatest finish.
- Step 4: Countersink holes if the screwheads need to sit flush; this prevents stress on the frame and keeps the fixings neat.
- Step 5: Fix the backplate to the fixed frame using the recommended screws or rivets. Tighten screws evenly but do not over-torque; over-tightening can deform UPVC frames and aluminium sections.
- Step 6: Attach the arm plate to the sash and secure with the correct screws or rivet. If the restrictor uses a locking pin or key mechanism, fit and test the lock function now.
- Step 7: Test the operation through a full open/closed cycle and open to the restricted position multiple times; ensure the sash closes fully and the restrictor is not bearing weight in an unintended way.
- Step 8: If the restrictor has a key or quick-release, test release and re-engagement several times to ensure smooth operation and no binding.
Trade tips and common pitfalls
- Always use corrosion-resistant fixings: stainless steel is best, especially in coastal or high-humidity environments.
- When fixing into UPVC, avoid over-tightening screws; use a torque-limited driver or stop when screw heads are seated and the frame is not distorting.
- Pre-drill pilot holes 0.5–1 mm smaller than the screw diameter for the strongest engagement and to prevent split frames in timber.
- For aluminium frames, consider pop rivets for a clean, vibration-resistant fit; use a hand or pneumatic riveter sized to the rivet specification.
- Document the installed restrictor type and location for your client or household records; include keys for keyed models in a safe, labelled place.
Maintenance and checks
Regular maintenance extends the life of the restrictor and ensures ongoing safety. Carry out these checks every 6–12 months:
- Operate the restrictor and check for play, corrosion or wear in the hinge or locking components.
- Lubricate moving parts with a silicone spray or a small amount of light machine oil; avoid heavy greases that attract dust.
- Check screw tightness; retighten if necessary but do not overtighten.
- Replace any worn or corroded restrictors immediately; do not attempt to weld or modify the device in situ.
Recommended Products
Based on this article, you may find these products helpful:
- UAP Keyless Window Restrictor
- TSS Keyless Cable Window Restrictor
- TSS Fixed Cable Window Restrictor
- RES Lock Concealed Window Restricto
- ERAB Espagnolette Window Lock Universal Lock Replacement
Conclusion and next steps
Fitting a window restrictor is straightforward when you choose the correct type, prepare with the right tools and use appropriate fixings for the frame material. For properties where a window is an escape route, select a quick-release model and double-check that the restrictor does not prevent safe egress. If you are unsure about frame material, structural attachment points or regulatory requirements, call a specialist installer or request a site survey.
Next steps: select the restrictor type suited to the room and window from our product range, gather the correct fixings for your frame material, and schedule a test fit. For bulk or trade orders, visit our centre for trade pricing and technical support at /c/windows-restrictors.

Related articles
Window Restrictors
What Is a Cable Window Restrictor? How They Work
What Is a Cable Window Restrictor? How They Work A cable window restrictor is a simple mechanical device fitted to a window to limit how far it can open. I...
Cable Window Restrictor Safety Features Explained
Cable Window Restrictor Safety Features Explained What a cable window restrictor does and where it is used A cable window restrictor is a safety device fit...